Wednesday, December 30, 2009

Toasted Quinoa with Mandarin Oranges


(You are about to enter my thought process. Beware.)

Tonight we're having broiled salmon, sauteed spinach and what? I've brown-riced myself to death the last few days, so maybe some quinoa. But not just plain quinoa. Something jazzier. That everyone will like. Hmmmm. Think I'll sit down with a few cookbooks for inspiration.

What? You need a ride where? Ask Dad. (sorry; thoughts were interrupted. Back to reality.)

1,000 Gluten-Free Recipes, a cookbook I received as a holiday gift from a gluten-free client, provided inspiration for tonight's side dish. I've sneaked a few tastes, and so far, so good... I think everyone will enjoy this, once my husband gets back home.

Toasted Quinoa with Mandarin Oranges

Serves 4 - 6 as a side dish

1 teaspoon canola oil
1 cup uncooked quinoa -- rinsed
1 14 ounce can low-sodium chicken broth
3/4 cup water
1 11 ounce can mandarin orange -- drained
1/4 cup sliced toasted almonds
1/2 small red bell pepper -- chopped
2 tablespoons green onion -- chopped
1/2 cup fresh basil, cilantro or parsley -- chopped
1/2 cup orange juice
2 tablespoons fresh lemon juice
2 tablespoons rice vinegar
1 tablespoon honey
1 tablespoon olive oil
1 teaspoon orange zest
1 teaspoon lemon zest
1/2 teaspoon salt
1/4 teaspoon pepper

In small heavy saucepan, heat oil over medium heat. Toast quinoa for 4 minutes, stirring, until seeds are lightly toasted.

Add broth and water. Bring to a boil. Reduce heat to low and cook covered for 15 minutes, or until quinoa is tender. Remove from heat and let cool at least 10 minutes.

Combine cooled quinoa, oranges, almond, bell pepper, green onions and fresh herbs in a bowl. Toss well.

Combine dressing ingredients in a screw-top jar. Shake well. Pour most of dressing over the salad (I didn't use it all). Season with sea salt and freshly ground pepper to taste.

Thursday, December 24, 2009

Ode to Tofu

I love tofu in any way shape or form, and over the years, I've made desserts, dressings, cheese-less pasta fillings and stir-fries with it. I'm always amazed at how tofu accepts all the flavors around it and becomes something new with each recipe.

Take silken tofu: in dressings and desserts, it adds a creaminess and texture that's missing from most dairy-free products. My all-time favorite use of silken tofu is this Chocolate Mousse.

Firm and extra-firm tofu are my choices for hearty dishes such as stir fries and baked tofu dishes. However, the problem is that tofu is packed in water, and water does not add flavor to anything. In fact, it just makes things, well, watery. Getting rid of the water involves a step called pressing the tofu, which can be messy and involves wads of paper towels, plates and weights and frequently results in puddles of water on the kitchen counter.

Enter the TofuXpress, which presses the water from tofu without all the mess. Fellow Blogger Ellen Allard was singing its praises, so I've decided to throw my toque into the ring in her contest to own my very own Tofu X-Press. Then making dishes like her yummy stir-fry will be even easier!

Wednesday, December 23, 2009

Maple-Pecan Granola


Having a container of homemade granola around the house is always a good thing. Whether you like to sprinkle it on top of yogurt, put some on your Cheerios for an extra crunch, or eat it out of hand, it never lasts too long. I made a double batch today, planning to give some to the in-laws when I see them on Christmas. I hope it lasts that long!

Maple-Pecan Granola
Makes 4 cups

2 cups old-fashioned or regular (not quick) oats
1/2 cup pecan pieces
1/2 cup pure maple syrup
1/4 cup packed light brown sugar
2 T. canola oil
pinch of salt
pinch of cinnamon
1/2 cup dried fruit (cranberries, raisins, apricots... whatever you like)
2 T. flaked coconut (optional)
2 T. sunflower seeds (optional)

Preheat oven to 300 degrees. Line a large rimmed baking sheet with parchment paper.

Mix the oats, pecans, maple syrup, brown sugar, oil, salt and cinnamon in a large bowl, stirring with a rubber spatula until combined. Pour mixture out onto prepared baking sheet.

Bake for 35 - 40 minutes, stirring every 10 minutes or so. Keep a very close eye on this during the last few minutes; it can burn very quickly. It's done when the nuts and oats are deep brown but not burnt. Let cool completely. Stir in dried fruit, coconut and sunflower seeds.

Monday, December 21, 2009

Beef Satay Sticks


All four family members were swooning over this supper, which doesn't happen every day.

I chose this recipe from Rachael Ray's Big Orange Book for a few reasons:
TS (Teenage Son) loves beef; DD (Darling Daughter) will try almost anything; DH (Dear Husband) also loves beef and Asian flavors; and I'm up for anything in the name of pleasing the family and testing out a new recipe.

After bathing the beef in a simple marinade, I seared it on a very hot griddle (flat skillet without sides). I didn't have enough skewers for all the beef, but it didn't matter. DH ended up eating the skewer-less strips with his fingers, right off the serving platter. That's how good it was!

The recipe also includes a peanut dipping sauce. TS and I didn't even use it, though DH thought it added an extra layer of flavor and DD will eat anything with peanuts in it. So it's up to you; skip the sauce if you don't think it will be a big hit with the family. I served the Satay Sticks with white rice and steamed broccoli.


Beef Satay Sticks

Serves 3 - 4

1 pound top round steak, cut against the grain into thin, 1 1/2-in. wide strips
1 1/4 cups teriyaki sauce (I used Soy Veh)
2 cloves garlic, peeled and smashed
1 squirt Sriracha chili sauce (more if you like it spicy)
For the peanut sauce:
1/2 cup apple juice
1 inch piece fresh ginger, peeled
1 cup smooth peanut butter
For the garnish:
1 lime
4 scallions, thinly sliced
2 T. sesame seeds

Mix 1 cup of the teriyaki sauce with the smashed garlic cloves and chili sauce in a glass bowl. Add the steak strips and let them hang out while you make the peanut sauce.

In a small saucepan, combine the remaining 1/4 cup teriyaki sauce, apple juice and piece of ginger. Bring to a boil and then turn off the heat and let it sit for a few minutes. Remove the ginger and discard. Whisk in the peanut butter and a squeeze of lime juice, if you have a lime on hand.

Preheat a flat grill pan or griddle over medium-high heat. Skewer the meat on wooden or bamboo skewers (or not - it will still taste great!) and sear for just a minute or two on each side. Place the meat on a platter and sprinkle the sliced scallions and sesame seeds on top. Squeeze a little lime juice on top, too, if you like. Serve.

Recipe adapted from Rachael Ray's Big Orange Book, "Lean Mean Spicy Beef Satay Sticks."

Sunday, December 20, 2009

Risotto


I gave myself this pressure cooker as an early Christmas gift. I've been thinking about investing in one for a year or so, and now that I have a client who adores meals like pot roast, stew, hearty soups and barbecue beef sandwiches, I had a good excuse to buy one. These dishes can take hours to cook (and more time to cool before packaging), making them a major time-suck on a cookdate. With the pressure cooker, I should be able to prepare them in much less time, thus shortening my work day. I'm all for that!

I didn't realize until I read the little booklet that came with my PC that my model can also cook rice, polenta and risotto. That seemed like an easy, cheap entry into pressure cooking, so last night I christened the PC by making risotto.

Risotto is usually a time-consuming dish to prepare, with the cook standing at the stove stirring the liquids into the rice forever and a day. The PC eliminated that business and still produced a creamy, toothsome risotto.

Besides being a tasty side dish, risotto is versatile: different herbs and cheeses can be added to it to change its flavor. It can be prepared ahead of time and then molded into little patties or balls and fried. Or, with the addition of some protein, risotto can be turned into your main dish. I added some cooked shrimp and peas from the freezer and voila, dinner was ready.

Risotto
Serves 3-4

2 T. olive oil
1/4 cup finely diced shallot
1 cup Arborio rice
2 cups low-sodium chicken broth
1/4 cup dry white wine
pinch saffron threads
1/4 cup grated Parmesan cheese
2 T. chopped parsley

Use the "Brown" setting to saute the shallots and rice in oil until tender, 4 - 5 minutes. Turn off the Brown setting. Add the broth, wine and saffron. Close the lid and turn the knob to "Pressure." Set the timer for 10 minutes at High pressure. When done, release the pressure and open the lid. Stir in the Parmesan cheese and parsley. Serve. (I mixed in about 1/2 box of frozen peas and 1/2 lb. cooked shrimp.)

Adapted from the Fagor Electric Multi-Cooker booklet.

Sunday, November 29, 2009

Feast of Two Fishes


Prosciutto Roasted Cod

Moules Marinières

I love seafood and decided to double down last night by trying two new recipes.

Prosciutto Roasted Cod was a simple preparation which would be good with any white fish... sea bass and halibut come to mind. I opted for cod knowing it's a fish that the rest of the family will eat. They don't like sea bass or halibut. Their loss.

After lightly oiling the fish and the baking sheet, I seasoned the fish with salt and pepper and wrapped a thin slice of prosciutto around the middle of each fillet and roasted it all in a 400 degree oven for 10 minutes. To amp up the flavor, I brushed the cooked fillets with rosemary butter. Any herb or even garlic butter would do. This is very good served with roasted vegetables or even a tomato-based side dish. It's on the mild side, so definitely go nuts with your side dishes!

I decided to try my hand at Moules Marinières after reading the recipe in Garlic and Sapphires, Ruth Reichl's very funny account of her days as restaurant critic for the New York Times. It sounded easy and it was (the recipe, NOT the job of restaurant critic). To top it off, a pound of mussels is $1.79... you can't beat that!

Moules Marinières
Serves 4 (can be cut in half if necessary)

4 pounds mussels, scrubbed clean and debearded
1 onion, diced
2 shallots, diced
1 cup dry white wine
3 T. unsalted butter
salt and pepper
chopped parsley

Combine the onion, shallots and wine in a large pot. Bring to a boil and simmer for 5 minutes. Add the mussels, cover and cook over high heat, shaking the pot from time to time, for about 4 minutes, or until all the mussels have opened. Discard any unopened mussels.
Add the butter, salt, pepper and chopped parsley to the pot. Serve mussels and broth in bowls, with bread to mop up the sauce.

Recipe from Garlic and Sapphires by Ruth Reichl.

Monday, November 9, 2009

Thai Chicken Soup


Tonight's dinner was a quick-to-prepare soup with Thai flavors. I stumbled across the recipe this weekend and it appealed to me for several reasons.

First, I love a soup where the chicken is simmered with the rest of the ingredients, then removed, shredded and put back in the pot to mingle again for a few minutes. Not only does the flavor of the meat enrich the broth, but the chicken is always so tender when cooked this way. Second, I haven't had Thai food in a while, and the ingredient list of coconut milk, Thai curry paste, cilantro and lime called to me. Finally, it seemed like the soup would be very easy to put together after a day of work, and it was.

I wished the soup was a bit spicier (I could have added more curry paste but I didn't want to overwhelm the more delicate palates at my table). I fixed that by adding a squirt of sriracha to my bowl just before serving.

I have the feeling this soup will only get better with age, so I'm glad we didn't finish the whole pot tonight.

Thai Chicken Soup
Serves 4

2 cups reduced-sodium chicken stock
1 15-ounce can coconut milk -- light is fine but not as flavorful as full-fat
2 teaspoons Thai red curry paste
1 15-ounce can diced tomatoes -- with juice
1 1/2 pounds bone-in, skinned chicken breast
4 scallion -- sliced, white and green parts separated
1/4 cup red bell pepper -- diced
1 1/2 cups cooked rice -- white, brown, black or jasmine
1/4 cup chopped fresh cilantro
2 tablespoons freshly squeezed lime juice
Thai fish sauce
salt and pepper
sriracha sauce
lime wedges

In a Dutch oven or large heavy soup pan, blend the chicken broth, coconut milk and curry paste. Set the pot over medium heat. Add tomatoes, chicken, scallion whites and bell pepper. Bring to a simmer. Cover and simmer until the chicken is cooked through, 20 to 30 minutes.

Remove the chicken and set aside until cool enough to handle. Shred the chicken and return it to the pot.

Stir in the cooked rice, cilantro, scallion greens, lime juice and a dash or two of fish sauce. Season to taste with salt and pepper.

Ladle soup into bowls. Add a squirt of sriracha and serve with a lime wedge on the side.

Adapted from Whole Grains Every Day, Every Way by Lorna Sass

Thursday, October 29, 2009

Slow Cooked Asian-Flavored Pork


I was all set to write about tonight's dinner, Pasta with Roasted Peppers and Sausage, when I discovered I'd already blogged about it in April. It was really good, so I do recommend that recipe.

Moving along, this is one of the crockpot recipes I tested out over the past weekend. Having never made or eaten boneless country-style ribs before, I wasn't sure what to expect. I'm not a big fan of baby back ribs; too fatty for me. But the country-style ribs reminded me of a lean pork shoulder after they slow cooked in an Asian-inspired sauce. I think this would work equally well with pork loin or shoulder, but I'm sticking with the boneless country-style ribs.

Slow Cooked Asian-Flavored Pork
Serves 4

1/2 cup low-sodium soy sauce
1/2 cup hoisin sauce
1/4 cup honey
1/4 cup pineapple juice
2 tablespoons rice vinegar
2 tablespoons sesame oil
1 tablespoon chopped garlic
4 pounds boneless country style spare ribs -- cut into 3-4 rib sections
sesame seeds and scallions -- garnish

In large ziplock bag combine all ingredients except ribs and garnish. Place cut up ribs in bag, seal, and turn to coat. Cover and refrigerate 1 - 2 hours.

Pour the bagged mixture into a crockpot, cover and cook on low for 3-4 hours, or until meat is tender and falling apart and registers 160 on meat thermometer. Place meat on plate/platter and garnish if desired.

Adapted from Not Your Mother's Slow Cooker Family Favorites by Beth Hensperger.

Friday, October 23, 2009

Thai-Style Chicken Thighs


My clients have been asking for crockpot meals, and after exhasting my small repertoire of slow-cooked favorites, it was time to test various other recipes and ideas. It's hard work, but someone's got to do it, right? Off to the grocery store I went for various cuts of meat and poultry that do well in the crockpot. That means cuts of meat with a bit of fat on them (no chicken breasts or pork tenderloin) as well as those cuts that get tender with a long, slow, moist cooking method.

Tonight's dinner featured boneless skinless chicken thighs, a close relative to boneless chicken breast except with a bit more depth of flavor, and not as dry (thanks to the fat) with a slightly meatier texture. I had my eye on this crazy-sounding combination, which I saw in Beth Hensperger's Not Your Mother's Slow Cooker Family Favorites. I added some green beans to Beth's recipe, cooked some jasmine rice at the last minute, and we had a really delicious, fuss-free dinner that everyone enjoyed.

Thai-Style Chicken Thighs
Serves 4 - 6
2 1/2 pounds boneless skinless chicken thighs -- fat removed
1 cup salsa -- I used Pace Mild Picante Sauce
1/4 cup smooth peanut butter
2 tablespoons low-sodium soy sauce
1 teaspoon fresh ginger -- I used minced jarred ginger
3/4 pound fresh green beans -- optional
1/4 cup chopped fresh cilantro
1/4 cup chopped peanuts -- garnish, optional
long grain jasmine rice

Coat inside of crockpot with nonstick spray and arrange chicken in crock. Stir together salsa, peanut butter, soy sauce and ginger. Pour over chicken. Top with green beans, if using. Cover and cook on HIGH for 3 1/2 hours, until chicken is tender and cooked through.

Serve chicken with sauce over rice. Sprinkle with chopped cilantro and peanuts, if using.

Thursday, October 15, 2009

Waffles for Dinner


DH turned the heat on in the house about 3 weeks ago, which was 20 days too early for me, but today, I have to admit, it's cold. In fact, I've stopped wearing shorts to cookdates, which means the temperature is hovering around freezing.

Between the weather, the darkness and the kids' exhaustion, I thought waffles for dinner would be a good idea. I found an interesting Multi-Grain Waffle recipe in a new cookbook, and it's delicious! The cinnamon and vanilla add a great flavor, and the combination of grains make the waffles substantial without being heavy (warning: do not put too much batter on the waffle iron. Otherwise, you will get a very heavy waffle. Trust me.)

Serve with fruit salad and veggie sausage (if you're a health nut like me) or bacon and sausage, if you crave that extra fat to insulate you from the cold. And don't forget the maple syrup!

Multi-Grain Waffles
Serves 4

2 cups buttermilk
1/2 cup old-fashioned rolled oats
2/3 cup whole-wheat flour
2/3 cup all-purpose flour
1/4 cup wheat germ
1 1/2 teaspoons baking powder
1/2 teaspoon baking soda
1/4 teaspoon salt
1 teaspoon ground cinnamon
2 large eggs, lightly beaten
1/4 cup light brown sugar
1 tablespoon canola oil
2 teaspoons vanilla extract
Pure maple syrup for topping

Mix buttermilk and oats in a bowl. Let stand 15 minutes.

Meanwhile, in another bowl, whisk together flours, wheat germ, baking powder, baking soda, salt and cinnamon.

After 15 minutes, stir eggs, sugar, oil and vanilla into the oat mixture. Add the wet ingredients to the dry and mix just until moistened.

Coat a waffle iron with nonstick spray and preheat. Spoon in just enough batter to cover 3/4 of the surface. Cook until waffles are crisp and golden brown. Repeat until all batter is used up.

Recipe from The Essential Eating Well Cookbook.

Monday, September 21, 2009

Oven-Fried Chicken


I've tried numerous recipes for Oven-Fried Chicken, which tells you right away that I haven't found the perfect recipe. Until now. This Oven-Fried Chicken was hailed as "the best chicken you've ever made," by TS (Teenage Son). High praise indeed from the sullen teen as he helped himself to seconds.

If you know me, you know I like to put a healthy spin on the foods I make. Oven-Fried Chicken is by definition healthier than regular old "Fried Chicken" because it's not cooked in a vat of boiling fat. I make it healthier by removing the chicken skin, and then locking in the juiciness and flavor with a moist wet coating followed by a judicious layer of highly seasoned crispy ingredients. The chicken is baked on a wire rack, which lets all the surfaces crisp up evenly.

Oven Fried Chicken
Serves 4

1 1/3 cups Crispex cereal
2 1/4 cups broken Sea Salt flavor melba toast
1 tablespoon canola oil
2 teaspoons kosher salt
pinch cayenne pepper
1/2 teaspoon sweet paprika
1/2 teaspoon freshly ground black pepper
1/2 cup light mayonnaise
1 teaspoon Dijon mustard
4 bone-in chicken pieces, skin removed (use legs, thighs or breasts, about 6 ounces each - cut large breasts in half crosswise to make two pieces)

Preheat the oven to 400 degrees F. Set a rack on a foil-lined baking sheet. Spray the rack generously with cooking spray.

Finely grind the cereal and toasts together in a food processor. Transfer crumbs to a large gallon size plastic bag. Add the oil, salt, cayenne, paprika, and ground pepper and toss to mix thoroughly. Whisk the light mayonnaise and Dijon mustard together in a medium shallow bowl. Add chicken to mayonnaise and turn to coat all the pieces evenly. Drop the chicken into the plastic bag, seal and shake until each piece is evenly coated. Place coated pieces on the prepared rack. Spray the chicken pieces evenly with cooking spray, and bake until the coating crisps and browns and an instant-read thermometer inserted in the thickest part of the pieces registers 160 degrees F, 35 to 40 minutes.

Transfer to a platter and serve hot or at room temperature.

Adapted from a recipe on FoodTV.com

Sunday, September 13, 2009

Tofu-Pumpkin Custard - a dairy-free delight


I developed this recipe for a client who asked me for flavorful, protein-packed, low-calorie breakfasts. Her ideal breakfast would be a one-dish affair she could heat up quickly before heading out the door for work. Her dietary restrictions include no dairy (except eggs), no gluten, very few (peeled and cooked) fruits, and no nuts or seeds.

Judging from the contents of her refrigerator and some things she's told me about what she likes to eat for breakfast, I thought sweet breakfast items (rather than savory) would appeal to her. This custard is one of my creations, and I have to say, it's delicious! The first time I made it, I did not include the egg or egg white, and it was a bit dense. If you cannot eat eggs, by all means, leave them out. You'll still love this custard.

Tofu-Pumpkin Custard

Yield: 4 cups

12 ounces silken tofu -- drained and pressed between paper towels
1 can pumpkin
1/2 cup real maple syrup
1 large egg -- beaten
1 large egg white
1 teaspoon vanilla
1 teaspoon pumpkin pie spice
1/2 teaspoon cinnamon
1/2 teaspoon nutmeg
1/4 teaspoon ground ginger
4 8-ounce oven-proof ramekins or custard cups

Press tofu to remove excess water. Place in bowl of food processor and process until smooth and creamy, using spatula to wipe down sides of bowl once. Add remaining filling ingredients and process until smooth and combined. Pour into greased 8-ounce ramekins. Place ramekins in an oven-proof 9x13 dish that has about 1" of water in in. Place dish in 350 degree oven and bake for 25 - 35 minutes, until custards are set and beginning to brown on top.

Let cool. Top with a dollop of vanilla yogurt or whipped cream if desired. May be eaten cold or hot.

Source: adapted from Clean Food by Terry Walters


Per Serving: 212 Calories; 6g Fat; 10g Protein; 28g Carbohydrate

Friday, September 11, 2009

Presto Pasta Pie


Boy, this was easy AND delicious: just what we needed on a very busy Friday. With just a few ingredients from the fridge, I had dinner in the oven moments after walking in the door after a very late school pickup.

I used leftover cooked pasta, which made the dish come together that much more quickly. Not too spicy, not too weird, the dish won high marks from my diners (OK, the kids), who were especially appreciative that "there's no white cheese" (ricotta), which they don't care for. I served it with a spinach salad.

Pasta Pie
Serves 4 - 6

2 cups uncooked penne pasta (or 4 cups leftover cooked pasta)
2 cups marinara sauce -- Trader Joe's is good
6 ounces shredded monterey jack cheese -- or mozzarella
salt and pepper
2 ounces grated parmesan cheese
6 eggs -- beaten

Preheat oven to 375 degrees. Grease a 9" deep dish pie pan.

Cook pasta for 7-8 minutes, or until not quite cooked through. Drain and place in a large bowl. Pour scant 2 cups sauce over and mix well. Add 4 oz. of shredded monterey jack cheese and mix again. Season with salt and pepper.

Pour the pasta mixture into the greased deep dish pie pan. Pour the beaten eggs on top, trying to make sure the eggs trickle down into the pasta mixture. They add flavor and serve to bind the pie together. Cover the top with the Parmesan cheese and remaining shredded jack cheese.

Bake the pie for 35 - 40 minutes, or until the top is browned and the pie is set in the middle. Let sit at least 10 minutes before slicing into 6 wedges.

Source: adapted from a recipe in the Boston Globe.

Wednesday, September 9, 2009

Sweet Orange Salmon and Spinach Salad


School has started, and dinners (and blog posts) have suffered. I've been using the crockpot a fair amount, and while the meals have been good (did you know you can make Turkey Burgers in the crockpot?) they have been a bit unphotogenic. With the last days of summer here (must use the grill!), and the kids asking for their favorites (tacos and pasta), there hasn't been a whole lot of culinary excitement around here lately.

I knew it was time to put my "SuperMom" cape on, so tonight I prepared an old favorite (Spinach Salad with Strawberries) along with a new one (Sweet Orange Salmon). Not only did they taste great together, I'm pretty sure I gave the family more nutrition in one meal than they've had in the last week.

Sweet Orange Salmon

2 tablespoons brown sugar
1 teaspoon chili powder
2 teaspoons grated orange zest
1/2 teaspoon ground cumin
1/4 teaspoon smoked paprika
1/4 teaspoon ground cinnamon
salt and pepper
4 6 ounce salmon fillets
olive oil spray

Adjust oven rack to 5 inches below broiler.

Combine brown sugar, chili powder, orange zest, cumin, paprika, cinnamon, salt and pepper in a small bowl. Rub spice mixture over salmon fillets. Place salmon on a broiler pan coated with olive oil spray. Let salmon sit in the rub for 30 minutes.

Preheat broiler. Broil salmon for 6-8 minutes or until cooked.

Adapted from a Cooking Light recipe.

Wednesday, August 26, 2009

Ten Dollar Dinners: Reality Check


I'm a big fan of The Next Food Network Star, a reality series that gives ordinary people a chance to prove they have what it takes to star in their own show on the Food Network. This month, Melissa D'Arabian, a stay-at-home mom, beat out nine other contestants with her down-to-earth tips and bubbly personality to win Season 5. She's gone on to star in Ten Dollar Dinners with Melissa D'Arabian, which I have watched just once. The premise of the show is that you can make a delicious meal for four people for $10.

The episode I watched featured Crispy-Skinned Chicken a l'Orange, Perfect Crispy Potatoes and Fennel and Cabbage Slaw. When the show ended, my daughter and I agreed we should make that dinner for our family. So tonight I did (see photo above; for recipes visit the "Ten Dollar Dinners" link provided). We thought it was delicious, but I do have a question for Melissa (or whoever does her shopping): Ten dollars? Are you out of your mind?

My bill today:
3 Idaho potatoes $3.34
2 bone-in chicken breasts $9.22 (recipe calls for 3 but I wasn't feeding 4 people so I only got 2)
Frozen OJ concentrate: $1.39
Total: $13.95

I am not adding in the cost of oil, butter or honey, all of which I had here, OR the cost for the slaw ingredients, because I happened to have all of them here as well (except the bacon for the slaw, so I skipped it). So I spent over $10 and didn't even buy all the ingredients for the dinner. Bottom line: Tasty meal, but over the promised price point.

Sunday, August 23, 2009

Spinach Salad with Honey-Mustard Dressing


I couldn't believe it when I realized we hadn't eaten dinner as a family since last Saturday night, on Cape Cod. I'll spare you the crazy details, which involve a cat's hospitalization, DD's cheerleading schedule and a wacky pool party/barbecue at an old friend's house.

I guess that's what summer's all about, but I for one missed the family dinner. Tonight I was pretty sure we'd all be here, so I grilled a flank steak, made some roasted potatoes and threw together this spinach salad. DH liked the dressing so much he ended up drizzling it on his steak. 'Nuff said.

Spinach Salad with Honey-Mustard Dressing
Serves 6 - 8

1 tablespoon dijon mustard
1/2 tablespoon whole grain mustard
1/4 cup white vinegar
1/4 cup honey
1/4 cup olive oil
1/4 cup canola oil
1 scallion -- chopped
salt and pepper
1 box baby spinach
Toppings: Choose whatever you like
2 hard boiled eggs -- chopped
1/4 cup crumbled blue cheese
12 cherry tomatoes, halved
4 white mushrooms, sliced
8 strip bacon -- cooked, chopped
1/4 cup sunflower seed kernels

Mix dressing ingredients together until emulsified (an immersion blender works great for this).
Place spinach on a platter or in a bowl. Arrange toppings around the edge. Let your guests choose what they like, or toss the salad together and drizzle with dressing.

Wednesday, August 19, 2009

Comfort Food for Gluten- and Dairy-Free Client


The above picture represents the comfort food portion of yesterday's cookdate, and it's all gluten-free and dairy-free. This special-diet client loves comfort food, and requested Lasagna Rollups and Tex-Mex Tortilla Bake as two of her four entrees for yesterday's cookdate. My usual style of cooking is a little lighter and with more emphasis on fresh vegetables, but I have definitely put a healthy spin on these traditional foods.

The Lasagna Rollups are a new recipe that I knew she'd like, because they include tofu, spinach and kalamata olives, some of her favorites. I used Tinkyada rice lasagna noodles, which cooked and rolled up beautifully, as well as soy cheeses and lots of fresh basil. I prepared the rollups and divided them up between two dishes, one for her fridge and one for the freezer.

The Tex-Mex Tortilla Bake is an old family favorite which I've adapted for her, taking out a few things she can't have (black beans, corn and cheese), switching from flour tortillas to rice tortillas, and using soy cheese to replace the cheddar/jack combo I would normally use. The dish includes lean ground turkey and some great spices. After baking this dish, I cut it into 4 large pieces and package two fresh and two frozen.

Tex-Mex Tortilla Bake (gluten-free, diary-free)
Serves 4


1 tablespoon olive oil
1 small onion -- chopped
2 cloves garlic -- chopped
1 1/4 pounds ground turkey
1 large can tomato sauce (Muir Glen is gluten-free)
1 tablespoon chili powder
1 teaspoon cumin
2 rice tortillas
1/2 package soy cheese (jack or cheddar)
3 tablespoons fresh cilantro

Heat oil in skillet. Saute onion and garlic for a few minutes. Add turkey. Cook all until done. Drain fat from skillet.

Stir in tomato sauce, chili powder and cumin. Taste and adjust seasonings. Add salt and pepper.

Place one tortilla in a sprayed 9x9 dish. Top with a spinkling of cheese, half of the meat, a sprinkling of cilantro, and more cheese. Repeat, ending with cheese. Cover with sprayed aluminum foil and bake 350 degrees for 20 minutes. Let cool for several minutes. Cut into 4 wedges.

Serve with soy sour cream and cilantro-avocado salsa (mix fresh cilantro, chopped avocado, chopped tomato with some salt, chili powder and lemon or lime juice).

Monday, August 17, 2009

Hummus for lunch

Pre-Vacation Meal: Crabcakes, Swordfish Kebabs, Pasta Salad, Green Salad

Post-Vacation Meal: Hummus and Vegetables

We're just back from a few days on the Cape, where I ate exclusively vegetarian with the exception of a fantastic lobster on Wednesday night. My veggie streak continued today, as I returned home to a very empty fridge and quite sick of peanut butter (my road trip staple). So I whipped up some hummus for lunch. It's a very easy and economical dip to have around, and you can jazz it up by altering the amounts of garlic, lemon or hot sauce, or even add in some roasted red peppers, olives or fresh herbs (none of which I have in my sad post-vacation fridge).

The better looking meal was created before we left on vacation. My brother and his family stopped by on their way to Cape Cod, and I made a tasty dinner featuring seafood and salads. I also made those irresistable sliders for the kids, which they gobbled up. Time to get to the grocery store.

Hummus

Makes about 1 1/2 cups

1 can chick peas, drained and rinsed
1 - 2 (or more) cloves of garlic, crushed
1 lemon (or more), juiced
3 T. tahini
3 T. olive oil
3 T. water (maybe)
salt
hot sauce

Place chick peas, crushed garlic, lemon juice and tahini in bowl of food processor. Process until very finely chopped, scraping the sides of the bowl once. With motor running, pour in olive oil and continue to process. Add some water if it looks too thick. Add a pinch of salt and a few dashes of hot sauce. Turn off the motor and taste. Add more salt and/or lemon if desired. Serve with raw or blanched vegetables, pita chips or crackers.

Friday, August 7, 2009

Did someone say summer?


This week I had the opportunity to check out a nearby farmers' market AND visit my favorite farmstand, so I'm swimming in local produce (not to mention the loaf of Honey Whole Wheat bread that called to me from the Great Harvest Bread Co tent).

Tonight I'm planning to grill a couple of flank steaks to serve with my locally-grown corn and Stacked Tomato-Basil-Mozzarella Salad. The tomatoes and basil were grown a few miles from here, and the mozzarella traveled from Vermont, so I consider it local in that it's not from Italy, or New Jersey. For dessert, maybe some fresh peaches and ice cream. Mmmmm.

Stacked Tomato-Basil-Mozzarella Salad
Serves 4 or so

4 - 5 locally grown tomatoes, such as beefsteak or heirloom varieties
1/2 lb. fresh mozzarella cheese (you may want more if you like thick slices of cheese)
12 - 14 fresh basil leaves
freshly ground black pepper
about 1 T. highest quality extra virgin olive oil
sea salt

Using a serrated knife, slice the tomatoes and lay on a cutting board. Sprinkle with pepper. Wash the knife and use it to slice the mozzarella in thin slices. Assemble your stacks by placing a large tomato slice on the bottom, followed by a slice of mozzarella and a basil leaf. Repeat, ending with a small tomato slice. Slide a fancy toothpick through the center of the stack and place it on a plate. Repeat with remaining ingredients until you have 6 or so stacks. Drizzle the stacks with about 1 T. of extra virgin olive oil and sprinkle with sea salt. Serve.

Sunday, August 2, 2009

Beef and Broccoli Stir-Fry


Everyone at my house enjoys Asian flavors, and TS is on an all-out beef bender, so I thought this would make a great dinner for us tonight. Although the recipe seems very bland, it was perfect for the non-adventurous palates at the table. Think of this recipe as a starting point: feel free to add ginger, different vegetables, more red pepper flakes, orange zest or some hot chile oil to customize this to your tastes. For my group, it was perfect as is.

Beef and Broccoli Stir-Fry
Serves 3 - 4

1 1/2 T. cornstarch
1/4 t. salt
1/4 t. pepper
1 pound sirloin tips, sliced against the grain very thinly
2 T. canola or peanut oil
10 ounces broccoli florets, steamed for 2 min. in microwave
3 cloves garlic, minced
1 t. dark sesame oil
3 T. low-sodium soy sauce
1/4 cup water
pinch of red pepper flakes

In a large bowl, combine cornstarch, salt and pepper. Add sliced beef and toss to coat.

Meanwhile, steam the broccoli in the microwave (Zip n Steam bags work great for this).

Heat 2 T. canola oil in large nonstick skillet or wok until very hot, but not smoking. Add beef (in batches if necessary) and stir fry until cooked through, about 2 min. Transfer to a clean bowl.

Add steamed broccoli and garlic to skillet. Drizzle with sesame oil and stir-fry over moderately high heat until broccoli is tender and garlic is pale golden, about 1 - 2 min. Add soy sauce and water to skillet and bring to a boil. Return meat to skillet and cook, stirring, until sauce thickens, about 1 min. Scatter pinch of red pepper flakes over all and serve.

Friday, July 31, 2009

Vegetable Enchiladas


Today's lunch was Vegetable Enchiladas, which really hit the spot on this rainy afternoon. I love experimenting with vegetable entrees, and this one's a keeper. I believe this recipe originally appeared in the magazine Everyday Food. A fellow personal chef brought it to my attention, and I thought about making it today because I was pretty sure I had everything I needed in the fridge and pantry. Don't you love it when that happens?

I used leftover corn on the cob from last night as well as an opened can of beans from Wednesday's Taco Night. I'm sure I didn't use 3 cups of cheese; I'm just not that into cheese. But you go ahead and use as much as you like.

The recipe makes eight hefty enchiladas; if you don't need that many, the easiest thing to do is make the full batch but divide it between two 8x8 dishes. Bake one dish now and freeze one for another time.

Vegetable Enchiladas
Serves 8

2 tablespoons olive oil
1 teaspoon ground cumin
1/4 teaspoon hot chili powder -- more or less, to taste
1/4 cup all-purpose flour
1/4 cup tomato paste
1 can reduced-sodium vegetable broth -- (14 1/2 ounces)
Coarse salt and ground pepper
3 cups grated Jack cheese (I used soy cheese. Any cheese you like is fine here)
1 can Kuner's Seasoned black beans -- (15 ounces)(if you can't find this brand, use plain old black beans and add some cumin and chili powder to the mix)
1 box frozen chopped spinach -- (10 ounces) thawed and squeezed dry
1 box frozen corn kernels -- (10 ounces) thawed, or corn cut from 4 - 5 ears of corn
6 scallions -- thinly sliced, white and green parts separated
8 corn or flour tortillas

Make sauce: In a medium saucepan, heat oil over medium. Add cumin, chili powder, flour, and tomato paste; cook, stirring, 1 minute. Whisk in broth and 3/4 cup water; bring to a boil. Reduce to a simmer, and cook until slightly thickened, 5 to 8 minutes. Season with salt and pepper, and set aside.

Make filling: In a large bowl, combine 2 cups cheese, beans, spinach, corn, and scallion whites; taste and season with salt and pepper.

Lightly oil two 8-inch square baking dishes; set aside. If using very stiff tortillas, stack them up, wrap in damp paper towels and microwave on high for 1 minute to make them more pliable (or stack and wrap in aluminum foil, and heat in oven for 5 to 10 minutes). Top each tortilla with a heaping 1/3 cup of filling; roll up tightly and arrange, seam side down, in prepared baking dishes.

Dividing evenly, sprinkle enchiladas with remaining 1 cup cheese, and top with sauce.

Either bake or freeze. To bake, place uncovered pan in preheated 400 degree oven until hot and bubbly, 15 to 20 minutes. Cool 5 minutes; serve garnished with scallion greens.

To freeze, wrap tightly and freeze. Thaw completely in the refrigerator overnight and then bake as directed above.

Thursday, July 30, 2009

Wild West meets Metro West


Guys, if you live around here and you're looking for a really delicious hamburger (or grilled chicken sandwich), have I got the place for you.

Wild Willy's Burgers in Worcester serves the absolute best burgers around! Fellow blogger Ellen Allard piqued my curiosity with this post. Hubby and I tried the place a few weeks ago and couldn't wait to bring the kids when they got home from camp. So last night, the four of us, plus two of TS's friends, piled in the Pilot and went to Worcester for burgers.

(Here we have a few members of the happy group, in between bites. Picture was taken with my Blackberry, so please excuse the quality.)

I had the "Rustler" again - a grilled chicken breast with barbecue sauce, lettuce and tomato. (I confess, I don't really like hamburgers, though one of these days I'm going to try Wild Willy's Bison Burger, just to say I did.) The rest of the table had burgers in various forms (bacon, cheese, onions), plus of course fries, onion rings and pickles. The final word: "Best burger I ever ate" said TS (and he should know; that guy eats a burger every time we eat out anywhere).

One last thing: Wild Willy's is NOT upscale. You walk in, stand in a corral-type line, look at the menu on the wall, order and pay. Then you take a gigantic playing card to your booth and display it so the server can find your table when your food comes out 10 - 15 minutes later. The decor is Wild West-meets-Metro West, with wooden booths, a sticky-handled self-serve pickle barrel and paper food wrappers.

Wednesday, July 29, 2009

Cookdate pictures


My pictures lately have been pretty blase, so I thought I'd add a little color to the blog with a couple of photos I took at yesterday's cookdate.

The top picture is Grilled Sweet Potatoes and Scallions. The one underneath is my favorite Rum-Glazed Shrimp and Mango Kebabs (recipe here).

Grilled Sweet Potatoes and Scallions
Serves 4 - 6

1 1/2 pounds sweet potatoes -- peeled, sliced into small wedges
6 cloves garlic -- smashed with side of knife but left relatively intact
1 tablespoon fresh thyme
3 tablespoons olive oil
salt and pepper
1 bunch scallions -- tops and tails trimmed
sea salt

Combine sweet potatoes, garlic and thyme in a large bowl. Drizzle with oil and season with salt and pepper. Toss to combine. Place on a baking sheet that's covered with a sheet of heavy-duty aluminum foil and roast for 20 minutes at 425, stirring occasionally. The potatoes should be almost cooked through.

Remove from oven, toss again, lay scallions on top and bring the entire tray out to the grill.

Place scallions and sweet potato slices on the grill and grill about 2 minutes per side, or until grill marks appear. Chop scallions into 2" lengths. Place all of the vegetables back on the foil with the garlic and toss. Season with sea salt.

Saturday, July 25, 2009

Pantry Chili


It's been an interesting week. TS returned home from camp a week early with a virus; DD returned from camp on time but was not thrilled to see TS camped out on the couch getting all of the attention.

So I divided my time this week working, attending to TS (from now on known as Virus Boy) and trying to get DD out of the house to do something fun. Some days were better than others, and I'll just leave it at that.

Anyhow, last night, VB's appetite returned from out of nowhere with a vengeance. At 5:30 he hoarsely announced from his spot on the couch, "I want spicy meat for dinner." Of course, I had a turkey breast in the oven, which didn't qualify as "spicy meat". I really wasn't in the mood for plain old turkey anyway. I decided to carve that up and freeze it for the future.

As I scrambled around looking for inspiration on the "spicy meat" front, DD put on a pout because I had promised her she could have her favorite vegetable, a baked potato, with the turkey breast, and she thought that plan was now ruined.

My choices were a bit limited, but I knew I had some ground turkey in the freezer. "How about some chili?" I asked the kids. To my great surprise and relief, DD answered, "I love chili" (how did I not know this after 12 years?) and VB said, "Can you make it extra spicy?" I assured him I could, and told her that chili is delicious on top of a baked potato, which made her happy.

I didn't have any tomato products in the pantry except for one can of diced tomatoes, which I ruled out because DD doesn't like any chunks of tomatoes in her sauces. I thought I'd wing it and use a jar of Newman's Own Marinara sauce, along with some chili spices, and see how it went. In the time it took the potatoes to bake in the oven, we had a respectable little pot of chili. Ole!

Pantry Chili
Serves 4

1 - 2 T. olive oil
One half onion, chopped fine
Two cloves garlic, chopped
1 lb. ground turkey (dark meat) or lean ground beef
1 can Chili Beans (essential ingredient - lots of flavor)
1/2 jar Newman's Own Marinara sauce (more or less)
1 cup water
1 T. regular chili powder
1 t. medium hot chili powder
1/2 t. ground cumin
shredded sharp cheddar cheese for topping

Heat oil in a Dutch Oven over medium-low heat. Add onion and garlic and slowly saute until soft, about 8 minutes. Add turkey, increase heat to medium, and brown completely. Drain off excess fat. Stir in one can of Chili Beans (undrained), sauce, water and seasonings. Simmer for 20 - 40 minutes. Ladle into bowls (or on top of baked potatoes) and top with shredded cheese.

Sunday, July 19, 2009

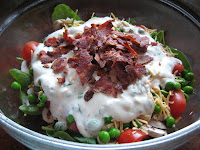
Layered Salad


This blast from the past is a refreshing make-ahead salad for your summer cookouts. Chances are your mother (or grandmother) made a salad like this: layers of lettuce or spinach, cheese, bacon and peas, all topped with a mayonnaise-based dressing and chilled overnight.

The 2009 version features more vegetables, a lighter dressing, and turkey bacon. And guess what? It's just as popular today as it was back then. I served this at a cookout with burgers, turkey sausage and chips.

Layered Salad
Serves 8 - 10

4 cups baby spinach leaves (one box)
1/2 cup shredded cheddar cheese
2 cups sliced fresh mushrooms
1/2 small red onion, sliced very thin
8 grape or cherry tomatoes, quartered
1 cup cooked green peas, chilled
1/2 cup light Ranch dressing
1/4 cup light mayonnaise
1/4 cup chopped fresh basil
4 strips turkey bacon, cooked and crumbled

Layer ingredients in a bowl as follows: spinach, cheese, mushrooms, onion, tomatoes and peas. Combine Ranch dressing, mayo and basil. Spread over top of salad. Cover and chill for 4 hours or overnight. Before serving, top with crumbled bacon. Serve.

Lucy's Pasta with Pesto


My daughter's home from camp, so I made one of her favorites for dinner last night. She has loved making and eating pesto since she was a little girl, and we've experimented with many recipes over the years to find the perfect pesto. This recipe, adapted from Cook's Illustrated, is her favorite.

Lucy likes her Pasta with Pesto straight up; I often add fresh tomatoes or chopped sun-dried tomatoes to my bowlful. I usually drizzle the cooked pasta with a bit of olive oil before adding the pesto, one spoonful at a time, until the noodles are coated to my liking. Depending on how much pasta you've cooked, there's a chance you'll end up with some leftover pesto. Not a bad thing!

If you have extra pesto, refrigerate it and use it the next day, spread on ciabatta for a summery sandwich of tomatoes and mozzarella. Thinned with a little olive oil, pesto makes a great dressing for an antipasto salad of arugula, tomatoes, olives and artichoke hearts. Or, if you're out of ideas (or food), freeze the pesto for another time.

Pesto
Makes about 1 cup, enough for 1 lb. of pasta

2 medium cloves garlic -- unpeeled
1/4 cup pine nuts
3 cups packed fresh basil leaves (about 4 ounces)
1 cup baby spinach (packed) -- about 1 ounce
salt and pepper
2 tablespoons fresh lemon juice from 1 lemon
1/4 cup extra virgin olive oil
1 1/2 ounces finely grated Parmesan cheese -- plus extra for serving
4-6 tablespoons mayonnaise

1. Bring a small saucepan of water to rolling boil. When water is boiling, add garlic and let cook 1 minute. Remove garlic with slotted spoon and rinse under cold water to stop cooking; set aside to cool. (If you plan to cook pasta at the same time, use a larger pot of water and cook the pasta in it after you're done cooking the garlic.)

2. When garlic is cool, press through garlic press into the bowl of a food processor. Add nuts, basil, spinach, salt, pepper, lemon juice, and oil to the bowl of food processor and process until smooth, scraping sides of bowl as necessary. Add cheese and mayonnaise and process until thoroughly combined. Transfer mixture to a small covered container. Refrigerate until ready to use.

Monday, July 13, 2009

Lettuce Wraps


Lettuce wraps hit the spot on a hot summer night, when you want something to eat but not too much. You might even find you have everything you need to make these in your fridge, especially if you've been cooking over the last couple of days and have a little of this and a little of that still hanging around. I bought the ground turkey and lettuce; everything else was already here.

Boston lettuce is the best for wrapping up these little bundles. You can use any protein (chicken, steak, tofu) and whatever vegetables you like. Fresh herbs such as mint or basil make the dish, as does a squeeze of lime over the mixture before you roll it up like a burrito and eat.

Lettuce Wraps
Serves 4

1 lb. ground turkey
salt and pepper
3 cloves garlic, chopped
1 tablespoon minced fresh ginger
pinch hot pepper flakes
2 - 3 cups of shredded or sliced vegetables, including peppers, scallions, cabbage, carrots, sprouts and/or snap peas
fish sauce, soy sauce, hoisin sauce, or plum sauce (or a combination)
One head of Boston lettuce, leaves separated, washed and dried
1/4 cup chopped fresh mint or basil
1 lime, cut into wedges

Cook turkey in a large nonstick skillet over medium heat until just about done, about 4 minutes. Drain excess fat. Season with salt and pepper. Add garlic, ginger, hot pepper flakes and vegetables and cook for 2 - 3 minutes, until vegetables begin to soften. Add a splash of fish sauce and a bit of soy or hoisin sauce and stir to combine. Taste and adjust seasonings as desired.

To serve, place a large spoonful of the turkey-vegetable mixture on a lettuce leaf. Top with fresh mint or basil and a squeeze of lime juice. Roll up and eat.

Saturday, July 11, 2009

Lattice-Topped Cherry Tart


To make up for last evening's lackluster meal, I decided to make a cherry pie for my husband this morning. Unfortunately, I didn't have quite as many cherries as I would have liked, so my pie became a tart, simply because the tart pan looked like it didn't require quite as much filling as my deep-dish pie pan.

First I pitted the cherries, which really was no big deal. I attempted to pit them with a paperclip, a la Martha Stewart, but that really didn't work. I ended up kind of squeezing each one and popping the pit out. Worked great.

Having never made a cherry pie before, I went to my Better Homes and Gardens Cookbook and followed their instructions, more or less. It was quite easy, and I highly recommend you make a tart (or pie) tonight for someone you love.

Lattice-Topped Cherry Tart
Makes 1 tart

3 1/2 - 4 cups fresh cherries, pitted (If you have 5 or more cups of cherries, by all means, make a pie)
1 cup white sugar
3 Tablespoons cornstarch
1 package of Pillsbury pie crusts or your favorite recipe for a double-crust pie
1 Tablespoon milk
coarse sugar for sprinkling on top

Mix the white sugar and cornstarch together in a bowl. Add the pitted cherries and stir. Let sit about 15 minutes, or until mixture gets kind of juicy.

Preheat the oven to 375 degrees.

While the cherries are getting juicy, place one pie crust in your tart pan. Slice the remaining pie crust into 10 strips. When the cherries are ready, stir them and pour them into the prepared pan. Place half of the strips on the pie from top to bottom, with about 1 inch inbetween strips. Fold every other strip back halfway. Lay another strip in the center of the tart, across the strips already in place. Unfold the folded strips and fold back the remaining strips. Place another pastry strip across the first set of strips, parallel to the strip in the center. Repeat the weaving until lattice covers the filling. Trim the pastry strips so they're even with the pan. Press them into the bottom crust to seal.

If you'd like, brush the milk on the lattice topping and sprinkle with coarse sugar before baking.

Bake the tart or pie on a cookie sheet in the oven for 45 minutes, or until the lattice top is light brown and the filling is bubbly. Let cool and serve.

Friday, July 10, 2009

Roman-Style Chicken


After seeing Giada DeLaurentiis prepare this on the Food Network, I thought I had to make it for myself. One of Giada's selling points of this recipe was that it tastes better if prepared ahead of time and heated up just prior to eating, making it a perfect recipe to add to my personal chef repertoire. So, earlier today, I prepared the dish, then cooled it and refrigerated it until dinnertime, when I heated it up on the stove.

Unfortunately, neither my husband nor I thought this was anything special. The combination of peppers, tomatoes, prosciutto, chicken, capers and broth was really not that flavorful in the end. The accompanying roasted potatoes with rosemary were quite good (I don't think there's any way to screw up a roasted potato). Since I took the picture, I thought I'd share it with you, in case you want to try it yourself, and also to prove that not everything I make turns out fantastic.

If you'd like the recipe, here's a link to it on the foodnetwork.com site.

Monday, July 6, 2009

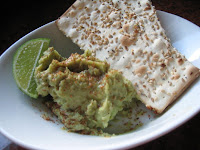
Avocado and White Bean Dip


My name is Martha, and I'm a snacker. Anyone who knows me will verify this. My usual snacks include nuts, soy cheese, crackers, pretzels, turkey, raisins, hard-boiled eggs, soy yogurt, fruit, and the occasional handful of Teddy Grahams. I try to keep it healthy but easy. A snack shouldn't require any more than 2 minutes to prepare, in my opinion.

Today I was feeling bored with my usual snacks and wanted something new. I like my snacks to be filling and nutritious, and with that in mind, I decided to make a dip by mashing together an avocado and a can of white beans (drained and rinsed). Good, but it needed a little zip, so I sprinkled the mixture with Penzey's Southwest Seasoning and a bit of lime juice. Snack time!

P.S. In case you were wondering, this dip is high in fiber, vitamins and minerals as well as heart-healthy monounsaturated fat. It's vegetarian, dairy-free, and inexpensive. Add grated onion or minced garlic for more oomph. Spread it on a wrap and add some raw vegetables or sliced turkey for a quick lunch. Mmmmm.

Monday, June 29, 2009

Grilled Pork Tenderloin with Two Salads


Tonight I made a Grilled Pork Tenderloin with Garlic-Orange Vinaigrette, Curried Couscous Salad, and an Arugula Salad with Red Grapes and Sunflower Seeds. The combination of colors, textures and flavors was outstanding.

I had made the salads earlier in the day, so about an hour before dinner, I poured the marinade ingredients in a large ziplock, added the pork and let it marinate for an hour or so. Then I grilled it for about 15 minutes and dinner was ready.

As an added bonus, the kiddos are off to camp, so I didn't have to worry about who won't eat scallions, who's a vegetarian this week and whether we'd have additional bodies at the dinner table, all of which tend to derail my plans faster than you can say "teenagers."

If anyone wants the salad recipes, let me know, and I'll post them.

Grilled Pork Tenderloin with Garlic-Orange Vinaigrette
Serves 3

2 T. orange juice
1 T. olive oil
1 clove garlic, chopped or pressed
1/2 teaspoon cumin
salt and pepper
1 lb. pork tenderlion
Vinaigrette:
2 T. orange juice
1 T. olive oil
2 teaspoons Dijon mustard
1 1/2 teaspoons honey
1 clove garlic, chopped or pressed
salt and pepper

Combine first 6 ingredients (orange juice through pork) in a large ziplock bag and marinate in the refrigerator for 1 - 2 hours.
Meanwhile, in blender or the cup of an immersion blender, combine vinaigrette ingredients and blend until smooth. Set aside.
Preheat grill to medium-high heat. Oil grill racks and grill pork for 3-4 minutes on each side, for a total of 12 - 20 minutes, or until pork is 145 degrees on a meat thermometer. Let pork rest at least 10 minutes before slicing.
Serve pork drizzled with Garlic-Orange Vinaigrette.

Friday, June 26, 2009

Beef Sliders, Act 1


I won't claim this is an original idea, but I had to post this recipe because of the amazing response I got from my family. I was testing this out for a party I'm doing, and before you could say "action" the family was in the kitchen, asking for a taste.
Act 1
(setting: kitchen, Anywhere, USA. Mother cooking, Darling Daughter at kitchen table talking. Teenage Son enters from stage left.)
TS: "What smells so good?"
Me: "Beef sliders."
TS: "I thought you said we could have pizza for dinner."
Me: "You can. I'm just testing this out. You can have this for lunch tomorrow."
(TS looks longingly at burgers, but sticks with his resolve not to eat his mother's cooking 3 days in a row and leaves the room.)
Darling Daughter: "Can I have one now?"
Me: "Sure. You can tell me how they are."
(Husband enters, stage left)
Husband: "Did you say 'Sliders'?"
Me: "Yes. Help yourself."
Husband: "Don't mind if I do."
(Silence. only chewing is heard)
DD: "Can I have another?"
Me: "You can have them for dinner later if you want, instead of pizza."
DD: "OK" (walks offstage)
Husband: "I'll have them for dinner, too."
(curtain closes)

*APPLAUSE*

Beef Sliders
Makes 24 sliders

1/2 cup dried onion flakes
2 pounds ground beef (at least 10% fat; 20% if you dare)
1/2 t. salt
freshly ground pepper
shredded cheddar cheese, if desired
24 dinner rolls
condiments of choice

Preheat oven to 400 degrees. Evenly spread dried onion on bottom of a 9x13 glass baking dish. Gently pat the ground beef on top of the onion flakes to form one large patty. Sprinkle with salt and pepper. Bake for 15 minutes. Remove from oven and blot top of burger with paper towels to remove some grease. Top with cheese, if desired, and return to oven for 5 minutes. Let stand for at least 5 minutes. Drain grease by tipping pan and pouring most of the grease out from one of the corners of the pan.
Cut burger into 24 portions (6x4). Place miniature burgers on dinner rolls and top with condiments of your choice.

This recipe comes from fellow bloggers Dinners for a Year and Beyond and Big Red Kitchen.

Wednesday, June 24, 2009

Salad days


It's fun to eat your greens when you mix things up a bit. Instead of a boring old salad, how about some mache (pronounced "mosh," which the kids think is hysterical), a little walnut-crusted goat cheese, and a drizzle of white balsamic vinaigrette? Tracy Harrison, owner of Purpose LLC, recently told me that salad greens + dressing is an optimal combination, because the fat in the dressing helps you to absorb the fat-soluable vitamins in the greens. So don't skimp on the dressing!

Mache with Walnut-Crusted Goat Cheese and White Balsamic Vinaigrette

Mache (I found a nice box at Whole Foods; use about 1 cup per person)
Chopped walnuts (about 1 T. per goat cheese round)
Mild Goat Cheese (about 2 T. per round)
optional: sliced or shredded carrots, berries
Dressing:
4 tablespoons white balsamic vinegar
3 tablespoons canola oil
3 tablespoons olive oil
1 clove garlic, pressed
1 tablespoon dijon mustard
1 tablespoon mayonnaise
2 tablespoons honey or agave nectar
salt and pepper

Arrange greens in a bowl. Add carrots or berries if using.

Slice goat cheese into rounds and roll in chopped walnuts. For an extra-delicious treat, place the goat cheese in the oven for a few minutes while you prepare the dressing, to get it warm and soft.

Make the dressing by placing all of the dressing ingredients in a blender or the cup of an immersion blender and processing until smooth.

Place the warm goat cheese on top of the greens and drizzle with dressing. Eat.

Saturday, June 20, 2009

Love at first bite


Imagine my surprise when I dug into my Dairy-Free Chocolate Mousse just now and the first spoonful came out shaped like a heart. I guess that's because I LOVE this dessert. Besides being airy and delicious, this mousse is and easy-peasy to make, and it satisfies my creamy-chocolatey craving like nobody's business.

Dairy-Free Chocolate Mousse
Serves 6

1/2 cup chocolate soy milk
1 1/2 cups all-natural semisweet chocolate chips
12 ounces silken tofu
1/4 cup amaretto
fine-grain sea salt

Measure the soy milk in a glass measuring cup and then place in microwave for 1 minute on High.

Measure chocolate chips into a microwave-safe glass bowl and nuke for 3 minutes at 50% power. Stir. Chocolate should be melted.

Place soy milk and melted chocolate chips in blender. Add tofu and puree until smooth. Add amaretto and sea salt and blend until combined. Pour mousse into 6 individual serving dishes. Let chill in refrigerator at least 1 1/2 hours. Mousse will set up as it cools.

Adapted from "Super Natural Cooking" by Heidi Swanson.

Eat your veggies!


Now that everything seems to be in season (well, almost everything), it's easy to incorporate lots of fresh, interesting vegetables in your meals. If you find yourself serving the same old vegetables day in and day out, shake things up a bit this summer. Visit a farm stand or farmer's market and pick up something fresh and vibrant.

This morning I homed in on a hefty bunch of organic carrots and a couple of zucchini as well as some fresh basil and thyme. I knew I'd be strapped for time (we attended a birthday party in New Hampshire this afternoon), so when I got home, I used two easy methods to get the vegetables cooked: oven roasting and sauteeing. In less than 30 minutes, I sliced and oven-roasted the carrots with some olive oil and fresh thyme (425 degrees). While they were in the oven, I shredded the zucchini and sauteed it in a bit of butter with garlic. When it was softened up, I topped it with fresh basil, sea salt, pepper and lemon zest. Meanwhile, I had a pot of quinoa cooking. Side dishes are done, no recipes required.

Sunday, May 31, 2009

Rum-Glazed Shrimp and Mango Kebabs


It's been a busy weekend of cooking at my house. The kids are out of school and the weather's been positively summer-like, all of which got me in the mood to cook some summery meals and eat on the deck. Over the last couple of days, I made a very interesting Feta and Watermelon Salad, Grilled Corn on the Cob, Sauteed Soft Shell Crab, and Rum-Glazed Shrimp and Mango Kebabs. Of course I also grilled the requisite hot dogs and hamburgers for the less adventurous diners. Since the kebabs were my favorite of all the dishes, I decided to share that recipe with you. I enjoyed the kebabs with a little watercress salad and a wild rice blend. They would be a nice hors d'oeuvre on a summer night as well. Enjoy!

Rum-Glazed Shrimp and Mango Kebabs
Serves 4

3 limes, juiced (for 1/4 cup lime juice)
1/4 cup rum
3 T. brown sugar
1 t. jarred minced ginger
1 1/2 t. cornstarch
1 T. water
1 ripe but firm mango
1 1/3 lb. large shrimp, peeled and deveined, tails on

Make the glaze by combining the lime juice, rum, brown sugar and ginger in a small saucepan. Bring to a boil, reduce heat, and simmer 3 - 5 minutes, whisking occasionally. Combine cornstarch and water and whisk into glaze. Cook for 30 seconds, whisking constantly. Remove from heat and let cool. (This step can be done hours ahead of time.)

Peel the mango and slice into large chunks.

Place the clean shrimp in a bowl and pour half of the glaze on it. Toss.

Thread the mango and shrimp on skewers. Brush with glaze. Grill skewers over medium-high heat for about 3 minutes per side. Brush with any remaining glaze and serve.

Saturday, May 23, 2009

Honey-Ginger Grilled Chicken with Israeli Couscous


Tonight's dinner came together very quickly, because I did most of the work earlier in the day.

I made the broccolini and marinated the chicken this morning while I was waiting for a coffee cake to bake, and I stirred up the couscous before I drove my son to a party, while I waited for him to do his chores ("You can't go to the party until you finish all of your chores" is guaranteed to work for everyone involved.). At dinnertime, I only had to grill the chicken and nuke the side dishes. Hubby ended up with the most work: he did the dishes.

Honey-Ginger Grilled Chicken Breasts
Serves 4


4 chicken breast halves
1/4 cup honey
1/2 cup Soy Veh Teriyaki Sauce
1/4 cup hoisin sauce
1 heaping teaspoon bottled minced ginger
1 T. ketchup
1 lime, juiced
pinch of cinnamon
pinch of crushed red pepper flakes

Place chicken breasts in a gallon ziplock bag. Whisk together marinade ingredients in a large bowl. Pour over chicken and marinate for 2 - 12 hours.

Heat grill to medium heat. Remove chicken from marinade. Pour marinade into a small saucepan and boil for 5 - 10 minutes.

Grill chicken on oiled grill grates for about 3 - 4 minutes per side. When cooked through, remove from grill and brush with reserved marinade. Serve.

Toasted Israeli Couscous with Pine Nuts and Mint
Serves 6


2 T. butter
1 small shallot, minced
1 1/2 cups Israeli couscous
1 cinnamon stick
1 bay leaf
2 cups (1 small can) reduced-sodium chicken broth
1/3 cup toasted pine nuts (Trader Joe's sells them already toasted)
1/4 cup chopped fresh mint (or parsley)
sea salt

Melt butter in medium size saucepan. Add shallots and saute until soft, about 5 minutes. Add couscous, cinnamon stick and bay leaf and stir until couscous starts to brown slightly, about 5 minutes.

Add broth and bring to a boil. Reduce heat to simmer, cover, and cook 8 minutes, or until couscous is tender and broth is mostly absorbed. Stir in pinenuts and fresh herbs. Sprinkle with sea salt to taste. Serve.

Wednesday, May 20, 2009

Curly Noodle Salad with Soy-Wasabi Vinaigrette


Everyone wants Asian flavors lately, and this salad is a great side dish for any Asian-flavored entree. In addition, it's so simple to prepare you'll make it again and again. I just finished throwing it together for tonight's dinner, which will feature Asian-Glazed Salmon. It would also be fine with some leftover grilled or rotisserie chicken tossed in for a one-dish meal. Add some sliced scallions or sesame seeds for crunch before serving, if desired.

Curly Noodle Salad
Serves 4-6

6 oz. curly Chinese noodles (found in Asian section of store)
1 cup frozen shelled edamame
4 oz. snow peas, trimmed and cut in half
4 oz. baby carrots, quartered
1 clove garlic, minced or pressed
3 T. rice wine vinegar
3 T. low-sodium soy sauce
1 T. dark sesame oil
1 T. wasabi paste (I mixed about 1/2 T. wasabi powder with close to 1 T. water)
4-5 radishes, thinly sliced

Put a large pot of unsalted water on to boil.

Place the edamame, snow peas and carrots in a large colander in the sink.

Cook the noodles as directed on the package. Drain them over the vegetables in the colander and rinse all with cold water.

Meanwhile, in a large bowl, whisk together the dressing ingredients (garlic through wasabi). Add the well-drained noodles and vegetables, along with the sliced radishes. Toss and serve, or refrigerate and serve later. This salad is best served cold or at room temperature.

Saturday, May 16, 2009

I need a personal chef!

I have been crazy busy the last two weeks... business is going very well and I've been swamped with more evening activities than usual.

As a result, my family has been forced to (gasp!) order pizza, eat fast food, make sandwiches and look forlornly at each other at dinnertime, wondering if they'd ever have another home-cooked meal or fresh vegetable (well, they wondered about the meals. I don't think any of them were overly concerned about the lack of vegetables).

These last two weeks illustrated to me the challenges many families face at dinnertime, and it made made me long for my own personal chef. How great it would have been for them (and me) to open the fridge at dinnertime and find a delicious meal all ready to eat.

Now that things have calmed down for a couple of days, I've taken the opportunity to plan our week's meals and grocery shop, and I'm going to prepare a few meals so we'll be all set for the week to come. I'd still love my own personal chef, but I'm also secretly very happy that my picky teenage son requested the Sirloin Stir-Fry tonight (see blog post from April 26) and that I can get back to providing the dinners that they love. As my husband reminded me, "I just want dinner to magically appear in front of me at 6:15." Consider it done.