Sunday, August 1, 2010

Taking a break

Hello out there -

I've decided to take a break from blogging for a while; life has been busy, and blogging has fallen to the bottom of my priority list.

I still enjoy reading your blogs and will continue to do so, but for now, I'm on a "blog-cation."

Martha

Sunday, July 18, 2010

Grilled Corn on the Cob


I had no intention of blogging about humble old corn on the cob, until my husband's eye's popped open as he was eating his first ear. "You need to set up a little shop in New York and just sell this. Like the Soup Nazi. Only you'd be the Corn Lady."

I really don't want to be known as the Corn Lady, so instead, I took a picture of the one remaining ear and will share my secret with you. It's the marinade, and really fresh corn. That's it. Make extra - you will eat it, if not right way, then later, cold, from the fridge, or the next day, cut off the cob and mixed into your favorite pasta salad. It's that good!

Grilled Corn on the Cob
Serves ??

4 - 6 ears of corn, shucked (husks and silks removed)
1 teaspoon finely chopped fresh rosemary
pinch of black pepper
2 T. olive oil
2 T. white balsamic vinegar
1 clove of garlic, pressed
coarse sea salt (for later)

Combine the rosemary, pepper, olive oil, vinegar and garlic in a small bowl and whisk until mixed. Place corn in a large ziplock bag or large shallow platter and pour marinade over it. Let stand at room temperature for about 1 hour.

When ready to grill, place corn on heated grill over medium heat and turn with tongs every couple of minutes, until it's starting to char and kernels are turning bright yellow. You will cook the corn a total of 6 - 10 minutes, depending on how hot your grill is and how large your ears of corn are. If you have any extra marinade in the bag or on the platter, drizzle it over the corn about halfway through the cooking time.

Remove the corn from the grill and place on a platter. Sprinkle with coarse sea salt and serve. No butter required.

Sunday, July 11, 2010

Grilled Halibut with Artichoke Caponata


If you believe there's nothing better than a piece of grilled fish with a cool vegetable relish on a hot summer night, I'm with you. Here's a great one to try: Grilled Halibut with Artichoke Caponata.

Caponata, an Italian cooked vegetable salad, typically includes eggplant, celery, capers and vinegar, often along with tomato, pine nuts and raisins, in a sweet and sour dressing. Chef Michael White's recipe, which I found in Food & Wine, uses artichoke hearts in place of the eggplant with delicious results. The original recipe called for mahimahi, which isn't readily available in these parts. I chose halibut, and it stood up very well on the grill and with the relish. Beware: this relish is vinegary (my mouth is watering recalling it), but in a delicious sweet/sour way. I made a few other changes to the recipe to suit my tastes (and available pantry items) - enjoy!

Grilled Halibut with Artichoke Caponata
Based on a recipe by Michael White
Serves 6

2 T. extra-virgin olive oil, plus more for rubbing fish
4 tender celery ribs,diced (1 cup)
1 onion, finely chopped
3 garlic cloves, thinly sliced
1/2 cup prepared tomato sauce
1/2 cup dry white wine
1 small jar marinated artichoke hearts, drained and chopped
1/2 cup pitted green olives, chopped
1/4 cup pine nuts
3 tablespoons agave nectar)
2 tablespoons small capers, drained
Kosher salt and freshly ground pepper
3 tablespoons shredded basil or parsley
Six 6-ounce halibut fillets

Directions

In a large, deep skillet, heat 2 T. of olive oil
until shimmering. Add the celery, onion and garlic and cook
over moderate heat until just softened, 4 minutes. Add the
tomato sauce, wine, vinegar, artichokes, olives, pine nuts,
agave nectar and capers and season with salt and pepper. Simmer
until the vegetables are tender and the liquid is reduced, 8
minutes. Stir in the basil or parsley and let cool. (The relish can be made up to 3 days in advance and refrigerated until use.)

Light a grill or preheat a grill pan. Rub the fish with
olive oil and season with salt and pepper. Grill over
moderately high heat, turning once, until cooked through,
about 9 minutes. (I use a sturdy grill basket to make sure I don't lose the fish in the grill grates.) Transfer the fish to plates, top with the
caponata and serve.

Saturday, June 26, 2010

Oven-Baked Chicken Polenta Florentine


We love polenta in my house, whether it's the kind in a tube, which I slice, brush with garlicky olive oil, and grill or saute until crisp, or the kind I make from scratch from finely ground cornmeal. I used to stand over the stove stirring the dangerously hot and sputtering mixture, until I discovered a fool-proof oven method, which I'll share with you below.

After cooking, polenta can be enjoyed plain as a side dish, in place of rice, pasta or potatoes, or it can be used as a base for your meal. For this recipe, I sauteed spinach, chicken sausage, onion and garlic and layered it on the polenta. You can change it up using any ingredients that appeal to you. This recipe is naturally gluten-free, and can be made dairy-free by substituting non-dairy cream, butter and cheeses where indicated.

Oven-Baked Chicken Polenta Florentine
Serves 6 - 8

6 cups water
1 1/2 cups cornmeal
2 teaspoons salt
1/8 teaspoon pepper
1/2 cup cream (soy cream can be substituted)
4 tablespoons butter
pinch Parmesan cheese -- grated or shredded

16 ounces baby spinach -- stems removed (my personal preference - not mandatory)
1 pound ground chicken or chicken sausage, removed from casings
1/2 small sweet onion -- minced
1 clove garlic -- minced
1 teaspoon Italian seasoning or poultry seasoning
salt and pepper
1 jar pasta sauce or 2 cups homemade marinara
12 ounces shredded mozzarella cheese (soy cheese can be used)
2 tablespoons parmesan cheese

Preheat oven to 425. Grease a 9x13 glass baking pan for the polenta (use a 9x9 pan if you cut the recipe in half).

In the greased baking pan, whisk together the water, cornmeal, salt, and pepper. Cover tightly with foil, and bake 30 minutes, stirring halfway though. At 30 minutes, the polenta should still be loose enough to whisk but not watery. If it's still too watery, let bake an extra 5 - 10 minutes.

Remove polenta from oven and add cream, butter and a pinch of parmesan. Whisk briskly until smooth. (This can be done hours ahead of time. Let polenta cool in pan and then proceed by topping with cooked ingredients.)

While polenta is baking, heat a large skillet over medium heat. Add damp spinach in batches, stirring frequently, until wilted. Pour mixture into a sieve and let drain.

Reuse the same skillet to saute chicken or sausage and onion until cooked through. Add garlic and cook another minute. Add seasonings and stir to combine. (This can also be done ahead of time. You can set the filling aside until you're ready to assemble and bake the dish.)

Layer all of the spinach and then all of the chicken mixture on top of the polenta. Top with sauce and cheese. Bake about 30 minutes, or until cheese bubbles and is beginning to brown. Use a big spoon to serve portions to your very grateful family and friends.

NOTE: I've had equally good success using Quaker Corn Meal (very finely ground) as well as Bob's Red Mill Polenta (a coarser grind) for making the polenta.

Saturday, June 19, 2010

Toffee Bars


We interrupt our usual healthy recipes to post this sweet treat. I've got two birthdays + Father's Day at my house this weekend, and one of the celebrants requested Toffee Bars as a special treat. I obliged, and was sampling one (for quality-control purposes) before I took the photo. Busted.

Toffee Bars
Makes 24

1/2 cup butter, softened
3/4 cup light brown sugar, packed
1 egg
1/2 t. vanilla
1 cup flour
1/8 t. salt
3/4 cup semisweet chocolate chips
1/3 cup chopped pecans (or walnuts)
1 Skor bar, chopped (about 1/3 cup)

Beat butter at medium speed for 30 seconds. Add brown sugar, egg and vanilla and beat until combined, scraping down the sides of the bowl once or twice. Beat in the flour and salt until combined.

Pat the dough into an ungreased 9x13 pan. Using wet hands will help with this painstaking process. Bake for 12 - 15 minutes at 350 degrees, or until edges are light brown and top is dry. Remove from oven and immediately sprinkle chocolate chips on top. When chips have gotten melty, about 2 - 3 minutes, spread with a spatula over the entire surface of the crust. Sprinkle nuts and toffee pieces over the chocolate and cut into 24 bars. Cool in pan on a wire rack.

Note: These bars get better with age, so prepare a day or two before you want to serve them if possible.

Recipe adapted from the New Better Homes and Gardens Cook Book.

Saturday, June 12, 2010

Cantaloupe, Prosciutto and Blue Cheese Salad


Inspired by a recipe I saw in Cooking Light, I shopped for a ripe cantaloupe, arugula and prosciutto on my last trip to the market, and put this summery salad together tonight (I had some blue cheese in the fridge already). In a matter of minutes, I had a flavorful side dish that everyone loved. I hope you do, too.


Cantaloupe, Prosciutto and Blue Cheese Salad
Serves 4

1 ripe cantaloupe, peeled, seeded and cut into bite-size cubes
1/4 lb. thinly sliced imported prosciutto, torn into bite-size pieces
1/2 cup crumbled blue cheese
1 cup arugula (if you don't like arugula, I think flat leaf parsley would make a fine stand-in)
drizzle of sherry vinegar
drizzle of best-quality extra virgin olive oil
freshly ground pepper

Combine the cantaloupe, prosciutto and blue cheese in a bowl or serving dish. Top with arugula. Drizzle with sherry vinegar and olive oil. Grind pepper over the top. Serve.

Monday, June 7, 2010

Tex-Mex Chicken Salad


This dinner is my fallback on those evenings when I really want to eat dinner at home, but don't want to stop at the grocery store or spend a lot of time on my feet cooking. I usually have all the ingredients needed, or some variation thereof, in my fridge and pantry. Plus, I know everyone likes it.

*Warning*: This is not as "clean" as my usual meals, but I consider it our home-made version of fast food, and feel that on an occasional basis, it's OK for a family to have a meal like this.

My husband, daughter and I eat this salad as is. I sometimes add avocado to my plate as well. Picky Teenage Son is happy with the chicken strips, his salad on the side, some ketchup and a glass of milk.


Tex-Mex Chicken Salad


Buffalo-style Chicken Strips (frozen or homemade)
Salad greens of your choice
1 can Mexi-Corn, drained
1 can black beans, drained
cherry tomatoes
fresh cilantro leaves
chopped bell peppers
shredded cheddar or jack cheese
Dressing:
equal parts barbecue sauce, ranch dressing and salsa, combined

Bake the chicken strips as indicated on the package.

Meanwhile, toss the greens with the corn, black beans, tomatoes, cilantro, bell peppers and cheese.

Place the warm chicken on top of the salad. Drizzle with the dressing. Serve.

Wednesday, June 2, 2010

Grilled Chicken with Cucumber-Melon Salsa


Fresh fruit salsas and relishes are a wonderful way to make a summery statement at dinnertime. Jazz up broiled tilapia, shrimp or grilled chicken with warm-weather fruit salsas made from mango, strawberries and melon. Add some fresh herbs, a bit of citrus zest or juice, and red onion, scallion or chives for bite, and your tastebuds will be singing a summer tune. Taste as you create; you might want to add a natural sweetener such as agave nectar, or a pinch of salt or red pepper flakes, depending on your taste.

Here's a tried-and-true recipe to get you started.

Grilled Chicken with Cucumber-Melon Salsa
Serves 4 - 6

2 cups (1/2-inch) cubed honeydew melon, canteloupe and/or watermelon
1/2 cup diced peeled cucumber
1/2 cup diced red onion
1/4 cup chopped fresh mint
1 teaspoon grated lime rind
3 tablespoons fresh lime juice
2 tablespoons extra-virgin olive oil, plus more for chicken
2 teaspoons minced jalapeƱo pepper
1 teaspoon light agave nectar
3/4 teaspoon kosher salt, divided
1/2 teaspoon freshly ground black pepper, divided
4 - 6 (6-ounce) skinless, boneless chicken breast halves
Cooking spray
Mint sprigs (optional)

1. Prepare grill to medium-high heat.

2. Combine first 9 ingredients; stir in 1/4 teaspoon salt and 1/4 teaspoon black pepper, tossing well to combine.

3. Place chicken in a shallow dish and drizzle with olive oil, salt and pepper. Place chicken on a grill rack coated with cooking spray; grill 5 minutes on each side or until done. Serve with salsa; garnish with mint sprigs, if desired.

Recipe adapted from Cooking Light

Tuesday, May 25, 2010

Chilled Zucchini Soup with Lemon-Cumin Shrimp and Cilantro Cream


A cool meal is just the ticket on a hot day, and here's a great one for you: Chilled Zucchini Soup with Lemon-Cumin Shrimp and Cilantro Cream.

I made this for a client today, and it's got so much going for it: it's cool and refreshing, surprisingly hearty and really flavorful.

My client doesn't eat dairy, so I used soy sour cream. I also changed up the recipe by using 1 1/2 pounds of shrimp for four main-dish servings, which I sauteed in the oil called for. I tossed the cooked shrimp with ground cumin (the client can't tolerate seeds), lemon zest, salt and pepper.

The finished product was an absolutely perfect hot summer day dish.

Great news: If tomorrow's forecast is hot and steamy (or company's coming for lunch or dinner), make the recipe a day ahead: each of the elements of the dish can be prepared ahead of time, and then assembled in the bowl prior to serving. Which will leave you as cool as a cucumber (or zucchini) come dinnertime.

Sunday, May 23, 2010

Saucy Tofu (or Beef) Stir-Fry


"What smells so good?" each child asked as he or she wandered into the kitchen yesterday afternoon. "Tofu," I answered, and my taste testers ran screaming from the room. Well, they didn't actually scream, but they went out to the back yard to play Frisbee after I reassured them that I also had some beef to stir-fry for those who didn't want tofu. The great smell came from the sauce, a combination of soy sauce and barbecue sauce, two condiments I always have on hand.

Aside from the family-friendly sauce, one of the great things about this recipe is that you can make it vegetarian, or you can make it with beef, or you can do both and please everyone at your table. It's up to you.

Another great thing is that you can do lots of preparation ahead of time (like when you're making school lunches in the morning and already have the cutting board out, or when you're in the room as homework helper but aren't needed yet). That way, when dinner time comes, you just need to heat up a pan for the stir-fry and boil some water for noodles or rice, and you'll be good to go.

I did a lot of the chopping in the afternoon, enabling me to sit on the deck with a glass of wine and act as the official Frisbee photographer later on. I don't think I should quit my day job just yet:


Saucy Tofu (or Beef) Stir-Fry
Serves 3 - 4

1 package of extra firm tofu, pressed and sliced into 1/2-inch thick slices, and/or1 pound of sirloin steak tips, sliced very thin
2 Tablespoons Canola oil, divided
2 - 3 bell peppers, sliced thin
1 onion, sliced thin
1 bunch broccoli, steamed for 3 minutes
2 - 3 cloves garlic, minced
freshly ground black pepper
3 Tablespoons low-sodium soy sauce
1/2 cup barbecue sauce
rice or noodles

Heat a large nonstick skillet over medium-high heat. Add 1 T. oil.

Add the peppers and onions; stir and cook for 6 minute or until crisp tender. Add the broccoli during the last minute of cooking. Remove all the vegetables to a cookie sheet and set aside.

Heat the other tablespoon of oil in the same pan.

If using tofu, place the slices in the skillet and do not move for 5 - 6 minutes. Flip. They should be golden brown. Cook the second side for about 5 more minutes. If using beef as well, remove the tofu and set aside. If not, skip the next paragraph (about cooking the beef) and proceed with the recipe.

If using beef, place the meat in the skillet and cook for about 2 minutes. Add the garlic and black pepper and cook about 1 minute more, until beef has just lost its pink color.

Add the soy sauce to the pan and cook for 30 seconds. Add the barbecue sauce and stir. Add the cooked vegetables back into the mixture and stir together. Serve over rice.

(If you've also cooked tofu, I recommend adding some sauce to the tofu before removing it from the pan, and then tossing some of the cooked vegetables with it.)

Saturday, May 15, 2010

Seafood and Vegetable Kebabs (and lunch the next day!)


Tonight's dinner was unplanned, made without a recipe, and absolutely delicious. In fact, it was the kind of meal I wish I could find on a restaurant menu, but I can't.

I was in the mood for scallops and shrimp tonight, so I picked some up at the fish counter this afternoon during my Saturday grocery shopping. Around 5 pm, I rummaged through the vegetable drawer and found half an onion, a few bell pepper pieces and a zucchini, which I chopped and marinated in olive oil, vinegar and some olive paste I had in the fridge. I tossed the seafood with a bit of olive oil, salt, pepper and lemon zest and let it sit while I preheated the grill.

Everything was grilled to perfection in under 10 minutes: my ideal restaurant meal, right in my own backyard. Life is good.

Editing to add - I turned the leftover shrimp and scallops into a "Poor Man's Lobster Roll" for lunch the next day. I chopped the seafood, added a stalk of finely chopped celery, a squeeze of lemon, a scant tablespoon of mayonnaise, salt and pepper and spooned it into a buttered, toasted hot dog roll. Life is good for a second day in a row!

Friday, May 14, 2010

Santa Fe Quinoa Salad


Lunch with friends is always a treat, and when your friends are personal chefs, it's even better!

A few of us have been trying to get together for lunch for a while, and today was finally the day. A little-known fact about personal chefs is that many of us have Fridays off. Why? Because our clients want to eat our meals during the week: Mondays and Tuesdays are my most sought-after days. When I cook for families on those days, they end up with a fridge (and sometimes freezer) full of meals to enjoy on busy weeknights. And, most personal chefs are our own bosses, so if we want Fridays off, we take them off.

Today, each of us brought a dish, and our lunch was suberb: Christine's Crab Cakes with Spicy Remoulade, Patti's (dairy-free) Cream of Asparagus Soup, Lyn's Marinated Vegetable Salad and my Santa Fe Quinoa Salad.

Santa Fe Quinoa Salad
Serves 4 - 6 as a side dish

3/4 cup quinoa
1 1/2 cups water
Kosher salt
1/2 teaspoon ground cumin
2 tablespoons fresh lime juice
4 tablespoons canola oil
Freshly ground pepper
1 15-ounce can black beans, drained and rinsed
1 small red bell pepper -- finely diced
1/2 cup finely chopped cilantro
1 3 ounce jar cocktail onions

In a medium saucepan, combine the quinoa, water and a pinch of salt; bring to a boil. Cover and simmer over low heat until the water is absorbed, about 15-20 minutes. Spread the quinoa on a baking sheet; refrigerate for about 20 minutes. (Or make quinoa a day ahead and refrigerate until needed.)

Combine the ground cumin, lime juice, oil, salt and pepper in a jar and shake until combined. Pour the dressing into a bowl and add the black beans, bell pepper, cilantro and cocktail onions. Scrape the quinoa into the bowl, season with salt and pepper and serve.

Make Ahead:
The quinoa salad can be refrigerated overnight.

Recipe adapted from Food and Wine, May 2010

Sunday, May 9, 2010

Laura's Greek Chicken Bake


It's a busy time of year at mi casa: we've got the school play, dance recital, lacross games, the invention convention, the arts festival and final exams on the agenda. Healthy meals and snacks are absolutely in order to keep everyone happy and energized, but most days, there's not a whole lot of time to shop and cook.

Yesterday afternoon I needed to whip up something that wasn't too heavy but would keep our stomachs from grumbling during DD's dance recital. I turned to my pantry and fridge, and then to my friend and fellow personal chef Laura Whalen's recipe for Greek Chicken. I served it with Spinach Orzo.

Laura's Greek Chicken Bake
Serves 3


1 package fresh chicken tenders (about 1 pound)
Penzey's Greek Seasoning, or salt and pepper
1 T. olive oil
1 large shallot, finely chopped
1 large clove garlic, finely chopped
1 small jalapeno, seeded and finely chopped
15-ounce can diced tomatoes with garlic and oregano
4 ounces sliced black olives (or kalamata olives or 2 T. capers)
4 ounces crumbled feta cheese
fresh parsley for garnish

Season the chicken lightly with Greek Seasoning or salt and pepper. Heat oil in a very large skillet over medium-high heat. Add chicken and brown on both sides (about 1 - 2 minutes per side); chicken will not be fully cooked. Remove chicken from pan and place in a greased casserole dish.

Turn down the heat and add the chopped shallot, garlic and jalapeno to the same pan and saute until the vegetables start getting soft, about 3 minutes. Add the tomatoes and olives to the sauce. Stir and pour over the chicken in the casserole dish. Top with feta cheese.

Bake casserole at 350 degrees for 25 - 30 minutes, or until chicken is cooked through and dish is bubbly around the edges. Garnish with parsely.

Spinach Orzo
Serves 3


Place a couple of handfuls of baby spinach in a colander in the sink. Cook 1 cup of orzo according to package directions. Drain the orzo over the spinach, to wilt the spinach. Season with butter, salt and pepper if desired. Toss and serve.

Monday, May 3, 2010

Cold-brewed iced coffee


Iced coffee is my a.m. drink of choice this time of year (and peanut butter toast is my breakfast year-round, in case you wondered). I love Starbucks' iced coffee, and Ann at my local Starbucks makes it just the way I like: mostly decaf, a splash of caffeinated coffee and a splash of soy milk. It's the perfect drink to get me through a hot morning of cooking.

When I'm home, I seldom make iced coffee. But this low-tech method was so appealing, I had to give it a try. I made up a batch (OK, two batches) over the weekend and enjoyed my first cold-brewed iced coffee this morning. Good stuff!

I started with Starbucks ground decaf, a couple of empty jars and a measuring cup. The straining part was a bit messy; next time I won't strain twice because it didn't seem necessary. I also didn't find it necessary to mix in any water when I made my drink. I just poured the coffee into a glass full of ice cubes, added a splash of soy milk, and was good to go.

Saturday, May 1, 2010

Meaty Calzones


A couple of my weekly personal chef clients are hooked on old-fashioned comfort food. Nothing pleases their families more than Baked Ziti, Meatloaf, Grilled Marinated Flank Steak or Oven-Fried Chicken. Now and then they branch out (two chose Vegetable Enchiladas this week), but for the most part, they ask me to prepare familiar foods.

Meaty Calzones seem to fit that bill. Made of seasoned ground beef and mozzarella cheese wrapped in individual pizza-dough packets, they're sort of a taco in a pocket, or a meat-za with a top.

I serve them with a mild marinara sauce for dipping, as well as a tossed salad, vegetables and dip or green vegetable - I love asparagus. (It's easy to roast while the calzones are cooling: toss trimmed asparagus with a drizzle of olive oil, salt and pepper and roast in the same 400 degree oven for 10 minutes.)


Meaty Calzones
Serves 4

1/2 pound lean ground beef
1/2 teaspoon dried Italian seasoning
salt and pepper
1 teaspoon cornmeal
1 tube refrigerated pizza dough
3/4 cup shredded mozzarella cheese
1/2 cup marinara sauce for dipping

Brown the ground beef in a skillet. Drain all the fat and season the meat with Italian seasoning, salt and pepper. Set aside.

Preheat oven to 400 degrees. Line a baking sheet with parchment paper. Spray the paper with nonstick spray and sprinkle with cornmeal. Unroll the pizza dough on the sheet and cut into 4 rectangles. Stretch each rectangle to about 6x5 inches. Place 1/4 of the meat in the center of each rectangle. Top with cheese.

Bring the long ends of the dough up toward the center and pinch together. Fold the ends in slightly toward the center to seal. Flip the calzone over so all the folds are on the bottom. Repeat for remaining 3 calzones. Prick the top of each with a fork and spray with nonstick spray.

Bake for 11 - 15 minutes, until dough is light golden brown. Let sit 5 minutes before serving with your favorite marinara sauce.

Wednesday, April 21, 2010

What do Alison Sweeney and Ham and Egg Sandwiches Have in Common?


I thought that might get your attention.

Tonight for dinner, I repeated the Lean Egg and Ham Sandwiches that I'd made and blogged about in February, though I simplified the process by not heating the ham and not using parsley tonight (that's a picture from last time). We got home from DD's lacross game after 6 pm, and I need to get dinner on the table quickly. Once again, these sandwiches came through. I served them with fruit salad, and the crowd was very happy.

Now, back to that title. As my husband was eating his second Ham and Egg sammy, he murmured, "These are marvelous." The last time I heard him use that adjective, he was watching Biggest Loser. Host Alison Sweeney appeared, looking, well, like only Alison Sweeney can. "She's marvelous," he purred.

I'm not sure if I should be green with envy or happy that he enjoyed his dinner so much.

Tuesday, April 20, 2010

Meal Planning 102


This is for those of you who've passed Meal Planning 101 and are ready for a higher level of meal planning. It takes into account the basics already covered in Meal Planning 101 but adds another element to streamline the process. Please open your laptops and we'll begin.

My latest attempt to make my life easier happened over the weekend, when I was trying to make my meal plan for the week. I decided to type up all the meals that at least 3 out of 4 of my family members like, by category. That ruled out categories like Tofu, Shellfish and Pork, since we don't have a majority who like any of those. What it left me with was Chicken/Turkey, Pasta, Beef, Seafood, and Salads/Light Meals. Not too shabby. I suppose I could have used different categories, like Italian, Chinese, All-American, Tex-Mex and Thai; or Grill, Oven, Crockpot, Saute, No Cook. Hmmm. Maybe next time around.

After deciding on the categories, I quickly typed in the names of recipes from my recipe binder that qualified as family favorites. I can always add new recipes, but for now I have 80+ recipes, which should keep us fed for quite a while.

The easy part was (and forever shall be) planning the meals for the week. By glancing at the list, I could pick a tried-and-true meal from each category for each night of the week. The best part is that the family has been so happy to see some of their old favorites at the table. We've enjoyed Asian-Grilled Chicken with Pot Stickers and Salisbury Steak with Mashed Potatoes and Peas.

Your homework is to make a list of meals your family likes, and see if it makes your meal planning any easier. Class dismissed.

Asian Grilled Chicken
Serves 4 - 6

One package boneless skinless chicken breasts (3 breast halves, about 1 1/2 lbs.: I used the package I got at the 5 for $25 sale!)
3/4 cup Soy Veh Teriyaki Sauce

Slice the chicken breasts horizontally so you get two equal size pieces from each breast (this is very easy to do if the breasts are slightly frozen). I do this because the thinner breast cooks very quickly on the grill.

Place the six pieces of chicken in a large ziplock bag with the Soy Veh sauce. Let marinate in the fridge for 2 - 6 hours.

Grill over medium heat for about 3 minutes per side, or until chicken is cooked through. Serve.

Friday, April 16, 2010

5 for $25


I'd never taken advantage of my grocery store's "5 for $25" meat special before this week, and now I'm not sure why. The meat is fresh and top-quality: I picked up three strip steaks, a package of chicken breasts and a package of turkey cutlets for $25. Other options included whole chickens, pork roasts, ground turkey breast, ground beef and Mrs. Budd's Chicken Pot Pies. Seriously.

According to my grocery receipt, I saved $10.15; the biggest savings came from the package of chicken breasts, which would have cost $8.94. So if I'd bought 5 packages of chicken breasts, I would have saved close to $20. But that's boring, in my opinion. I like variety.

I turned the strip steaks into Steak Shish Kebobs, following Amy's recipe, which I served with rice and corn. They were gone before you could say "mmmm."

I used my grill pan to make Grilled Turkey Cutlets in just three minutes. I sprinkled half of the cutlets with Penzey's Turkish Seasoning and half with salt and pepper, then brushed lightly with olive oil. I cooked them for 2 minutes on the first side, flipped and cooked for 1 minute longer. After placing on a serving platter, I brushed the spicier cutlets with barbecue sauce and left the others naked, for the less-adventurous eaters. I served the cutlets with a green salad and some pineapple, and it was one of the fastest dinners I've ever made.

No plans yet for the chicken breast, but I'm sure I'll think of something soon. And I'll definitely be stocking up at the next 5 for $25 sale.

Thursday, April 8, 2010

All in a day's work


Everything looked so colorful at today's cook date, I couldn't resist snapping a couple of pictures with my BlackBerry. While the colors don't pop quite as much as they did on the kitchen counter with the mid-day sun shining through the windows, I hope you get the picture.

On Thursdays, I cook for a family of six; they like simple foods that their kids will eat, and often request the same items each week. The top photo includes Baked Ziti (at the top of the picture - it's actually Unbaked Ziti - the client pops it in the oven the night they eat it); White Bean and Tomato Salad; Bacon and Cheese Quiche; and Emerald City Rice/Vegetable Salad.

The second photo includes the components for a Fresh Fruit Salad (black containers at the top); Chicken and Steak Fajitas with Onions and Peppers (two aluminum containers); and Hamburgers. The double aluminum pans are my cooling method: I place the hot food in one pan, which I place in a second pan full of ice. I stir the food and it cools quickly, enabling me to package it for the fridge or freezer without it being in the danger zone for any significant amount of time.

Today's Tip: I discovered that grilling a batch of hamburgers and then freezing them is the perfect way to have something for Picky Teenage Son to eat when he doesn't want what I'm serving for dinner. Or when he needs a meal at 3 pm. Or 11 pm.

Regardless of the time of day, all you have to do is take a frozen grilled patty from the freezer, place it on a microwave-safe plate, cover loosely and heat at 40% power for 2-3 minutes. The burger should be defrosted and warm at this point. Then flip the burger and heat for 1 more minute at 40% power (add cheese now if desired), and serve.

Wednesday, April 7, 2010

Dinner in a Pouch


Keeping with the "Meal-in-a-Container" theme, tonight I tried cooking fish in a foil packet, and guess what? It was really good! Want to see what it looked like? Keep reading...

The first step in this super-simple operation was tearing off a piece of heavy-duty aluminum foil for each piece of fish. For years I resisted buying heavy-duty aluminum foil, because I thought it was a waste of money. Well, as my husband's grandmother used to say, "You thought wrong." The stuff is priceless: I use it to line my baking sheet when I cook bacon in the oven and I have almost no grease to clean up; I use it wrap brisket and it doesn't leak, and tonight I used it for the fish packets, and again it came through for me.

I bought about 3/4 pound of salmon, cut it into two pieces, and put about 1 T. of a very secret mixture (see below) on each piece. Then I topped each piece with sliced pineapple and a sprinkle of crushed red pepper flakes. Could it get any easier?

Here's the fish after I prepped it, but before I sealed it up and put it in the oven.

And 20 minutes later, heeeeeere's dinner:


I served the salmon with vegetable fried rice (using whatever vegetables I had in the fridge) as well as some roasted asparagus. A simply delicious dinner!

Salmon in a Pouch
Serves 2 (can adjust quantities to serve 1 - 100)

heavy-duty aluminum foil!
1 T. teriyaki sauce
1 T. hoisin sauce
2 6-ounce pieces of salmon, skin removed
4 rings of pineapple, fresh or canned
sprinkle of crushed red pepper flakes

Tear off a piece of foil for each piece of fish. I would say my foil was about 10 - 12 inches by 18 inches. Spray with nonstick spray and place a piece of fish on each piece of foil.

Combine the teriyaki and the hoisin sauce in a small bowl. Spoon 1 T. of sauce over each piece of fish. Place two pineapple slices on top of the fish and sprinkle with crushed red pepper to taste. Seal the packet by bringing the top and bottom pieces of foil up and folding, then folding in the sides.

Packets can be prepared 8 hours ahead of time and refrigerated until ready to bake.

When ready to bake, preheat the oven to 375 degrees. Place the foil packets on a cookie sheet and bake for 20 minutes (if your salmon fillets are very thin, they will be done sooner; if very thick, they may need an extra couple of minutes). Remove from the oven, open carefully and serve.

Idea from Hungry Girl 1-2-3 by Lisa Lillien

Tuesday, April 6, 2010

Cup o' Breakfast


What do you eat for breakfast? It's every man for himself around here, and typical breakfasts are toast, bagels, frozen waffles or cereal: quick, easy and energy-providing, what with all those carbs. Another bonus is there's not much to clean up afterward; we each put our dishes in the dishwasher and off we go.

However, I like some protein at breakfast. It helps keep me full longer and makes me feel less bloated than a massive load of carbohydrates. I love eggs, but rarely want to whip out the skillet to cook them on a weekday morning, what with a full day of cooking ahead of me (not to mention all the dishes I end up doing while I cook).

Today I tried something new, and in the time it takes to toast a bagel, I had a mug full of steaming hot eggs and vegetarian sausage that was packed with protein and flavor. Inspiration came from Hungry Girl 1-2-3, Lisa Lillien's new cookbook of easy, low-calorie recipes. I don't use lots of the processed foods she promotes, but I do like her ideas and flavor combinations, so I used her egg mug idea with (gasp) real eggs and came up with a great breakfast with infinite possibilities (not to mention 20 grams of protein).

My Breakfast Mug
Serves 1

1 egg
1 egg white
1 Morningstar Farms Veggie Breakfast Sausage patty, thawed*

Spray a microwave-safe mug with nonstick cooking spray. Crack the egg and the egg white into the mug and mix it with a fork. Microwave on high for 30 seconds. Stir the eggs again and microwave for 20 more seconds, or until eggs are cooked through.
Crumble the sausage patty into the eggs and eat.

168 calories, 8 g. fat, 4 g. carbs, 20 grams of protein (made with above ingredients)

*Other possible add-ins in place of the sausage: shredded cheese, salsa, finely chopped vegetables, smoked salmon, bacon bits, chopped ham or turkey

Sunday, April 4, 2010

Snow Peas with Toasted Almonds


Last night's dinner proved once again that a dish using just a few quality ingredients almost always prevails as my favorite part of the meal. The fresh tastes sing out; there's nothing muddled or confusing; it's just clear, bright and delicious.

Let's take it from the top. I prepared Chicken Saute with Caramelized Ginger Sauce with side dishes Snow Peas with Toasted Almonds and brown jasmine rice. Despite an ingredient list that's twice as long as that of the side dish, the Chicken Saute wasn't twice as good. In fact, it didn't compare.

You can find both recipes by clicking on the links provided above; try them both. Or just try the Snow Peas, and let me know if you agree.

Friday, April 2, 2010

They Fought the Slaw (and I won)


The word "slaw" is not greeted with enthusiasm at my house, because my three taste-testers believe America's third-favorite condiment, mayonnaise, should be outlawed. You'll never find potato salad, egg salad, tuna salad or coleslaw gracing our dinner table. Even the minuscule amount of mayo I use to bind my crab cakes together has gotten me in trouble with the family.

Last night I was planning to make grilled wrap sandwiches on the panini press (prosciutto and shredded Gruyere on Joseph's Wheat and Flax Flatbread - outstanding!) and thought slaw would be the perfect partner, especially since I had a variety of crunchy vegetables doing time in the veggie drawer. The dressing would have to be something familiar and mayo-free, so I got out a couple of Asian condiments and went to town.

The family waived their right to remain silent and gave high praise to the mayo-free slaw. What they didn't know was that they were getting a powerhouse of nutrients in every bite; I'll keep that information on the QT for now.

Asian Slaw
Make a little or make a lot

A variety of crunchy vegetables, shredded or sliced thin (red cabbage, green cabbage, bok choy, carrots, scallions, snow peas, cilantro... use what you've got. A bag of broccoli slaw from the produce section would be great, too.)

low-sodium soy sauce
toasted sesame oil
fresh ginger, grated, or a gingery condiment such as chutney

A handful of toasted nuts or seeds for more crunch

Toss all the vegetables in a large bowl. In a small bowl, mix up the soy sauce and sesame oil with a whisk; start with about 2 T. soy sauce and a scant tablespoon of sesame oil for 2 - 3 cups of raw vegetables. Add some fresh grated ginger or something else gingery to amp up the flavor. I happened to have some very gingery mango chutney open, so I added about a tablespoon of that. Taste the dressing and see what you think. If you like it, pour it over the vegetables and toss well. They should be lightly coated with the dressing and not swimming in it.

Before serving, toss in the nuts or seeds for another layer of crunch. Enjoy!

Saturday, March 27, 2010

Jambalaya


As a Personal Chef, one of my responsibilities is to come up with new and different dishes for my clients every week. I look to magazines, TV shows, websites, restaurant menus and fellow bloggers for inspiration daily. Sometimes I feel like I spend all my waking hours trying to think up new meal ideas (some of my sleeping hours, too).

Inspiration can strike at the oddest times, as was the case with this recipe, which I stumbled upon in Family Circle magazine while on vacation recently. Vacation. A time of no work. But I couldn't help myself. I ripped it out, carried it home and made it soon after.

In my mind, there's nothing not to like about Jambalaya, the Creole combo of chicken, spicy sausage, shrimp, vegetables and rice. However, if there's something you don't like about it, it's not a deal-breaker - this is the kind of recipe you can fiddle with to your heart's content. You might not end up with the world's most authentic Jambalaya, but you will end up with a hearty, healthy meal. I adjusted the spices for my family and didn't include any seafood. It was a hit all around.

Jambalaya
Serves 6

1 T. vegetable oil
1 pound boneless, skinless chicken breast, cut into 1-inch pieces
1 package fully-cooked smoked chicken sausage (I used Hillshire Farms Smoked Chicken Sausage - use something spicier if you can handle it - we can't!)
1 medium onion, diced
1 green bell pepper, seeded and diced
2 ribs celery, chopped
1 1/2 t. Cajun seasoning
1 can diced tomatoes (use the kind with green chiles if you like heat)
1 cup long-grain white rice (I use Uncle Ben's Converted white rice)
2 cups low-sodium chicken broth

Heat oil in a large lidded skillet over medium heat. Add chicken and sausage and saute until chicken is no longer pink but not quite cooked through. Remove chicken and sausage from pan and set aside on a plate.

Add onion, green pepper and celery to pan and cook until vegetables are crisp tender, about 5 minutes. Stir in Cajun seasoning, tomatoes and their juices, rice and broth.

Bring to a simmer, cover and reduce heat to medium-low. Simmer for 20 minutes, until almost all the liquid is absorbed. Stir the chicken and sausage back into the pan, along with any accumulated juices. Cook, uncovered, until rice is tender and chicken is cooked through, about 5 more minutes.

This meal is just fine if you prepare it ahead of time, cool it, and then heat it up again before serving. Serve with hot sauce (such as Tabasco or Frank's) if you'd like to spice it up at the table.

Adapted from Family Circle magazine.

Saturday, March 20, 2010

Oat and Almond Breakfast Bars


When a friend called to see if I'd like to be part of the local elementary school's first Health and Fitness Fair/5K Run, I couldn't resist. Not only did both my kids attend the school, but I enjoy doing things in my community and spreading the word about healthy eating to anyone who will listen!

The event is next weekend, so I've been working on some handouts about quick, healthy meals, recipes and so forth. After talking to my Board of Health, I got permission to prepare and hand out a homemade snack (with some restrictions regarding potentially hazardous food). I decided fresh fruit and some sort of granola bar would be perfect, both for the runners and their families.

This was my first attempt at a granola bar, and I wasn't sure what to expect. The result wasn't too sticky or cookie-like, had a great texture and good flavor. I'm going to try to modify the recipe and remove the almonds, perhaps substituting another grain or some crisp rice cereal, because I'm quite aware of how many nut allergies there are these days. But I think these will be long gone by the time I whip up the next batch. They're that good!

Oat and Almond Breakfast Bars
Makes 24 bars


1/2 cup canola oil
1/2 cup honey
2 t. vanilla
1 large egg
2 cups old-fashioned oats, uncooked
3/4 cup flour
1/2 cup light brown sugar
1/2 cup sliced almonds
1/2 cup toasted wheat germ
1/2 cup raisins (I used a combination of raisins and Craisins)
3/4 t. salt
1/4 t. cinnamon

Preheat oven to 350 degrees. Line a 9x13 baking dish with nonstick aluminum foil or parchment paper. Spray the foil or parchment with nonstick spray.

In a 2-cup liquid measuring cup, combine oil, honey, vanilla and egg until well mixed.

In a large bowl, combine the remaining ingredients (I used my hands for this). With a rubber spatula, stir the honey mixture into the oat mixture until blended. It will look like there's not enough liquid at first, but keep mixing; it will all come together.

Use the spatula to scrape the mixture into the prepared pan. Use your wet hands to pat the mixture into the pan.

Bake for 25 - 30 minutes, or until pale golden around the edges. Cool completely in the pan on a wire rack, at least 1 hour. Use the foil or parchment to remove the entire rectangle from the pan to a cutting board. Cut into 24 squares. Store in a tightly covered container at room temperature for up to 2 weeks.

Recipe from Good Housekeeping.

Friday, March 19, 2010

Turkey Meatloaf with Roasted Red Pepper-Tomato Relish


Meatloaf: the ultimate comfort food. You either love it or hate it, right?

My family falls into the "love it" category (with the exception of Picky Teenage Son, who refuses to eat mixtures of any sort). I have several meatloaf recipes that the majority of us enjoy, including an Italian Meatloaf (ground beef, crumbled Italian sausage, parmesan cheese and marinara sauce make it really flavorful); a Skinny Meatloaf made of ground beef and ground turkey with a ketchup-mustard glaze; and Ina Garten's Turkey Meatloaf , a regular on the rotation around here. Clients request meatloaf frequently, too, so I'm always on the lookout for something new.

This recipe caught my husband's eye in good old Cook This, Not That, so I gave it a trial run. It was hands down the most flavorful turkey meatloaf we've ever had (sorry, Ina). I prepared the relish a day ahead, using canned tomatoes instead of fresh, which worked very well. We ate leftovers for a couple of days, and then I froze the remaining slices for lunches or dinners in the near future.

Turkey Meatloaf with Roasted Red Pepper-Tomato Relish
Serves 8

recipe adapted from Cook This, Not That, by David Zinczenko and Matt Goulding

Relish:
1 T. olive oil
1 medium yellow onion, sliced thin
2 cloves garlic, minced
1 can petite diced tomatoes, drained
1/2 cup chopped roasted red peppers
3/4 cup ketchup
1/4 cup Worcestershire sauce
salt and pepper to taste

Meatloaf:

1 T. olive oil
1 medium onion, chopped fine
2 cloves garlic, chopped
2 1/2 pounds ground turkey (93% lean)
2 teaspoons salt
1 teaspoon pepper
1 tablespoon fresh rosemary1/2 - 1 cup dry bread crumbs
2 eggs, lightly beaten

To make the relish, heat the oil in a medium saucepan over medium heat. Cook the onion for about 10 minutes, or until soft and translucent. Add the garlic and cook for 1 more minute. Add the tomatoes, ketchup and Worcestershire and simmer for 10 minutes. Taste and add salt and pepper if needed. (relish can be made a day in advance and refrigerated until ready to use.)

When ready to make the meatloaf, preheat the oven to 350 degrees.

Heat the oil in a medium skillet over medium heat. Cook the onion for about 6 minutes, or until soft and translucent. Add the garlic and cook for 1 more minute. Place the ground turkey in a large mixing bowl. Add 1 cup of the prepared relish along with the freshly sauteed onion and garlic and the rest of the ingredients for the meatloaf. Gently mix with your hands until everything is blended.

Turn the bowl over and let the meat mixture fall out onto a baking dish. Form it into a loaf shape and cover the top with half of the remaining relish.

Bake the meatloaf for 1 hour, or until the internal temperature is 160 degrees. Let cool at least 10 minutes before slicing. Serve with remaining relish.

Sunday, March 14, 2010

Quinoa with Asparagus and Chick Peas


We're back from vacation, and I for one am craving good-for-you, homemade food after OD'ing on restaurant fare for several days. I cooked up some quinoa the morning we got home and then hit the grocery store for some fresh produce, meat and poultry.
When I got home, I created this dish, which I've been nibbling on ever since.

Quinoa with Asparagus and Chick Peas
Serves 4-6 as a side dish

1 T. olive oil
1 can of chick peas, drained and rinsed
2 cloves of garlic, chopped
1 shallot, chopped
1 bunch of asparagus, ends snapped off and discarded, cut into 1" pieces
1/4 cup chicken stock
1 1/2 cups precooked quinoa
lemon juice, olive oil, salt and pepper to dress
optional: 1/2 cup toasted almonds

Heat olive oil in large skillet over medium heat. Add the chick peas and saute them, without moving them around, until they begin to brown on one side. Then stir and add garlic and shallot to the pan. Saute for a minute, then add asparagus, chicken stock and a pinch of salt to the pan. Cover and cook for about 3 minutes, until asparagus is bright green and begining to get tender.

Here's all the vegetables steaming in the pan:


Uncover the pan and stir in the cooked quinoa. Remove from heat and taste. Add some lemon juice, olive oil, salt and pepper if you like. Top with toasted almonds, if using, and serve.

Thursday, March 4, 2010

French Onion Soup


It was a dark and stormy night.

There were 4 starving teenagers at the house.

No, this isn't the start of a horror novel -- it's my life! My son's friends are a great group of guys, and they're always hungry. I love feeding them, but wasn't sure if the evening's dinner plan, French Onion Soup, was going to go over big. They surprised me by slurping it up; one even went back for a second bowl (that would be the bowl that Picky Teenage Son refused).

Once again, Cook This, Not That was the inspiration for this recipe. You don't have to wait for a dark and stormy night (or the arrival of a ravenous pack of teenagers) to prepare it.


French Onion Soup
Serves 6

1 T. butter
5 medium onions (red and sweet yellow), sliced thin (I used my mandolin)
1/2 t. salt
2 bay leaves
6 cups low-sodium beef broth
1/2 cup dry red wine
4 - 5 fresh thyme sprigs
black pepper
6 slices sourdough bread
6 slices swiss cheese

Heat butter in a large pot or Dutch oven over low heat. Add onions and salt. Cover and cook over low heat until onions are meltingly soft, at least 30 minutes and up to 60 minutes, depending on your patience. Stir every 10 minutes or so.

Add the bay leaves, broth, wine and thyme to the caramelized onions. Simmer on low heat for at least 15 minutes. Season with pepper. Discard bay leaves.

Preheat the broiler. Place six oven-proof bowls on a heavy baking sheet (one that won't go "boing" and twist). Divide the soup among the bowls. Top each bowl of soup with a slice of bread and a slice of cheese. Broil until the cheese is melted and bubbling; about 3 minutes. Serve.

Monday, February 22, 2010

Pasta Bolognese


Bolognese is a meat-based sauce made with carrots, onions, celery, beef broth, tomatoes and milk or cream and is typically served over a flat, wide pasta such as tagliatelle.

This version comes from my new friend, Cook This, Not That. The authors have slimmed down the traditional recipe by using lean meats and low-fat milk. A slow simmer gets it nice and thick and perfect for using on your favorite fresh or dried pasta, or even polenta. It would also make a very tasty meat sauce for a lasagna or baked ziti dish.

While it's not a diet food by any stretch of the imagination, this hearty homemade sauce deserves a place in your dinner rotation.

Pasta Bolognese
Serves 6 - 8

1 T. olive oil
3 cloves garlic, minced
1 medium carrot, diced
2 stalks celery, finely chopped
1 medium onion, diced
6 oz. ground turkey
6 oz. ground pork
6 oz. ground sirloin
1 can (28 oz.) diced tomatoes (I used crushed tomatoes)
2 T. tomato paste (I used tomato paste with Italian herbs)
1 cup reduced-sodium beef broth
1 cup low-fat milk
2 bay leaves
salt and pepper to taste
1 package fresh fettucine (or more)
fresh grated Parmesan cheese

Heat the oil in a large nonstick skillet over medium heat. Add the vegetables and saute until cooked through, about 5 minutes. Add the meat and stir with a wooden spoon until the meat is broken up and no longer pink.

Drain any accumulated fat from the pan. Add the tomatoes, tomato paste, beef broth, milk and bay leaves. Bring to a boil. Turn down the heat and simmer the sauce for at least 30 minutes (and up to 2 hours), until the sauce has thickened. Season to taste with salt and pepper and keep warm while you prepare the pasta.

Top the cooked pasta with the hot sauce. Serve sprinkled with the Parmesan cheese.

Sunday, February 21, 2010

Lean Eggs and Ham


Whether it's breakfast for dinner, brunch or, well, breakfast, you can't go wrong with this lean version of an egg sandwich. Picky teenage son chose this as one of his two selections from Cook This, Not That. I think you can see the corner of the book in the picture, as a matter of fact.

This is the book's version of Denny's "Belgian Waffle Slam" which boasts 940 calories and 53 grams of fat, not to mention setting you back $6.79. The Cook This version is all of 270 calories, with 11 grams of fat and a cost of under $1 per serving.

We all gave it two thumbs up.

Waffles with Ham and Egg
Serves 4, easily adjustable to serve 1 - 100

4 slices Canadian bacon or deli ham
1 T. butter (my addition to the recipe)
4 large eggs
salt and pepper
4 frozen whole grain waffles
2 T. pure maple syrup
4 T. shredded sharp cheddar cheese
fresh chopped parsley (optional)

Heat a large nonstick skillet over medium heat. Add the ham and cook briefly on each side, just to heat through and get a little brown. Remove the ham to a plate. Add butter to the pan. When it melts, crack 4 eggs around the edge of the pan, using a spatula to keep them from colliding. Let cook for a couple of minutes. Sprinkle with salt and pepper and flip the eggs. Cook to your desired degree of doneness (we all like them cooked through).

In the meantime, toast the waffles or place in a 350 oven for about 10 minutes until hot and crisp. Top each waffle with one slice of ham, a drizzle of maple syrup, a sprinkle of cheese and the warm fried egg. Sprinkle with parsley if desired, and serve with some fruit salad.

Friday, February 19, 2010

Chicken Pot Stickers


True confession:

There's a nice Barnes & Noble near my kids' school, and now and then I purposely leave the house early so I can stop and browse before I pick them up. Each time, I solemnly swear that I will NOT buy a cookbook or cooking magazine. And each time, I walk out with a cookbook or a cooking magazine. Sometimes both.

I recently purchased Cook This, Not That, which caught my eye because it features healthy spins on all sorts of favorite restaurant-type foods, from burgers to breakfast sandwiches to pasta dishes to comfort foods. My clients and my family love this kind of food, and a little extra inspiration never hurts (at least that was my justification for buying the book).

Last week, I asked my 2 kids and husband each to flag two recipes they'd like to try in the book. This is the family that really could care less what's for dinner, as long as it's vaguely familiar, lukewarm and ready to eat at 6:15 pm.

To my surprise, they flagged 13 recipes. Tonight I was inspired by the recipe for Chicken Pot Stickers from the Appetizers and Small Bites chapter. I wanted to bring a platter of something special to a cocktail party, and this was a big hit! I have put several more recipes from the book on our family menu for the upcoming week, so stay tuned for more tasty results.


Chicken Pot Stickers
Makes a big platter

1 bag frozen pot stickers (about 24 pot stickers; I got mine at Trader Joe's)
4 tsp. dark sesame oil, divided
2 tsp. canola oil
1 bag sugar snap peas (I use Mann's, found fresh in the produce section; they're already washed and strings removed)
2 T. hoisin sauce
1 T. soy sauce
1 T. rice vinegar
squirt of sriracha sauce
sesame seeds, optional

Cook the pot stickers in a big pot of boiling water until they float to the top, about 3 - 5 minutes. You don't want them completely cooked and mushy, but on their way to cooked. Drain and pat dry.

Heat 2 tsp. of sesame oil and 2 tsp. of canola oil over medium-high heat in a large nonstick skillet. Place the pot stickers in the pan and let cook for about 3 minutes per side, or until the sides are nicely browned.

Meanwhile, place the sugar snap peas in a glass bowl, cover with plastic wrap, and steam in the microwave for 1 minute. Remove plastic wrap. Toss browned pot stickers with sugar snap peas and 1 tsp. sesame oil in the bowl.

Make a dipping sauce by combining the hoisin, soy sauce, rice vinegar, sriracha and remaining teaspoon of sesame oil (or use any store-bought sauce you have around). Place the pot stickers and sugar snap peas on a platter, with the dipping sauce nearby (or toss them with the sauce and place on platter). Garnish with sesame seeds.

Recipe adapted from Cook This, Not That.

Thursday, February 18, 2010

Fish in a Flash


I don't seem to slow down all day, and my lastest quest is getting meals on the table fast. This dinner delivered, taking all of 5 minutes prep time this morning before I headed out the door and then 10 minutes start to finish this evening. You could prep the fish at dinner time; I happened to have a free moment this morning, so I got it ready then. I guess it helped that I had a bag of fresh breadcrumbs in the freezer, but if you don't, use some plain panko instead.

Fresh fish is the key to any successful fish dish, I've found. I'm lucky to live in a region where fresh fish is always available (though I see plenty of frozen fish in the market as well). I have tried both (side-by-side in some instances), and frozen fish doesn't hold a candle to fresh. I'm not talking about shellfish; I'm talking about fin fish, such as cod, haddock, tilapia, sea bass and salmon. Please don't buy them frozen if you can help it. They just don't taste as good, and may very well be the reason you think you don't like fish.

Tonight's dinner featured tilapia. In the time it took to preheat the oven and roast the fish, I cooked a cup of whole wheat couscous on the stovetop and steamed a bag of spinach in the microwave. I combined both of those with some dried seasonings for our side dish, and dinner was served.

Caesar-Baked Fish
Serves 3

3 tilapia fillet -- or cod or haddock
3 tablespoons mayonnaise (I like the olive-oil mayo)
3 tablespoons fresh grated Parmesan cheese
1/2 lemon -- zested
1/2 teaspoon salt -- or to taste
dash ground black pepper
3/4 cup fresh breadcrumbs
lemon wedges to serve

Preheat oven to 450 degrees.

Place fish fillets in a greased baking dish.

Combine mayonnaise, Parmesan, lemon zest, salt and pepper. Spread over fish fillets. Top with breadcrumbs. (This step can be done hours ahead. If making ahead, cover with plastic wrap and refrigerate until ready to bake.)

Bake about 10 minutes, or until fish flakes easily and crumbs begin to brown. Serve with lemon wedges.

Wednesday, February 17, 2010

Turkey Sausage-Stuffed Manicotti


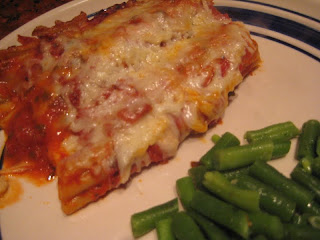
Judging from the title and the picture, you would probably believe me when I told you that this manicotti is delicious (it's true). You might even believe me if I told you that this dinner is much more healthful than anything you'd get at a restaurant (making healthy versions of favorite foods is my specialty). But I'm sure you wouldn't believe me if I told you how incredibly simple it is to prepare Sausage-Stuffed Manicotti. The only dish or utensil involved in the preparation is one casserole dish. Read on, and become a believer.

Turkey Sausage-Stuffed Manicotti
Serves 7

1 25 ounce jar marinara sauce -- I used Whole Foods 365 Tomato-Basil Sauce
1/2 cup water
8 ounces manicotti -- uncooked (1 box)
1 1/4 pounds turkey sausage -- I used Turkey Store Sweet Italian Sausage
1 cup part-skim mozzarella cheese
1/4 cup grated Asiago cheese (Parmesan would be good, too)

Preheat oven to 350 degrees. Spray a 9x13 casserole dish with nonstick spray. Pour 1 cup of sauce onto the bottom of the pan.

Add 1/2 cup water to remaining sauce in the jar. Replace lid and shake to combine.

Remove casings from the sausages. Take approximately 1/3 of one sausage link and roll it into a skinny tube in your hands. Gently insert it into the uncooked manicotti shell. Place the shell in the pan. Repeat the process until you've used all the shells and sausage; you should have 14 filled shells.

Pour the remaining sauce on top of the manicotti. Cover with foil and bake for 1 hour and 15 minutes. Remove foil and top the manicotti with both cheeses. Return to the oven for 8 - 10 minutes, until cheeses are melted and manicotti is tender. Remove from oven and let stand for 10 minutes before serving.

Sunday, February 14, 2010

Cape Cod Lollicakes


As much as I wish I could pull off a cute dessert like this, there's really no way that's happening in my kitchen. Last time I had friends over, I had a bowl of M&Ms for dessert. That's about as good as it gets around here, dessert-wise.

So I ordered a dozen "lollicakes" (cake on a stick) from Cape Cod Lollicakes for my husband for Valentine's Day. He loved the presentation, and offered us each one. The chocolate covered lollicakes have a cookie dough cake filling; the pink covered lollicakes have a chocolate cake filling. These pops contain some of the tastiest cake you've ever had. Highly recommended. The only problem is, he's not willing to sharing the rest. :-(

Friday, February 12, 2010

Round 2: Tilapia with Tomato-Olive Sauce


Cooking once and eating twice is always smart. Sometimes I plan to do so: I'll grill or bake extra protein and serve it again another night in a pasta dish, salad or quesadilla. Sometimes I don't plan, but it just happens, like when I made the roast beef. We had some leftover, so I incorporated into a fried rice entree a couple of days later. Last night was one of those "didn't plan it that way" nights.

The polenta and sausage from Wednesday's dinner were long gone, but I still had a cup or so of the chunky tomato-vegetable sauce. I hadn't served served fish this week, and I thought the sauce would go really nicely with almost any white fish or even shrimp. So I stopped in at Shaw's on my way home from work and picked up some tilapia fillets along with a scoop of pitted kalamata olives. I also should have bought some fresh parsley; I could have sworn I had some here, but I guess not.

At home, I put the olives in the sauce and sliced them a little bit with a dinner knive and fork (I really didn't want to dirty a cutting board - you know the feeling, right?). I set it in a little saucepan over low heat while I made the fish.

After seasoning the fish with salt and pepper, I heated a little olive oil in a nonstick skillet, sauteed the fish for a couple of minutes on each side, topped it with the newly olive-infused sauce, and wished I had some fresh parsley to scatter over the entire creation. Served with rice and (leftover) broccoli, it was a fantastic, easy weeknight meal.

Wednesday, February 10, 2010

Polenta with Chicken Sausage and Tomato-Vegetable Sauce


This happy accident had my critics going back for seconds (all except Picky Teenage Son, who got up only to get a yogurt from the fridge). Getting PTS to go back for seconds of anything is like pulling teeth, which made me think the old Trident gum phrase, "3 out of 4 dentists surveyed recommend Trident for their patients who chew gum." Well, 3 out of 4 of my family members recommend this dish.

My dinner plan involved using a roll of polenta I'd picked up at Trader Joe's along with the al fresco chicken sausages that were on sale at Roche Bros. this week. I figured I'd need a sauce, so I opened the veggie drawer and pulled out half an onion, half a bell pepper and a portobello mushroom cap, sauteed them with some garlic, added a can of tomatoes and some seasonings, and dinner was ready.

Polenta with Chicken Sausage and Tomato-Vegetable Sauce
Serves 3 - 4

2 - 4 T. olive oil, divided
about 1 cup of chopped vegetables, such as onion, bell peppers, mushrooms and/or zucchini
2 cloves garlic, minced
splash of white or red wine
1 can petite diced tomatoes with garlic and olive oil
1 tsp. dried Italian seasoning
salt and pepper
1 tube polenta, sliced into 10 - 12 rounds
1 package al fresco chicken sausage (fully cooked), I used the spinach and feta flavor
freshly grated parmesan or asiago cheese

Heat about 2 T. oil in a large skillet over medium heat. Saute the vegetables until they begin to soften, about 5 - 8 minutes. Add the garlic and cook 1 minute longer. Add a splash of wine if you'd like, and stir around to scrape up any bits that are beginning to stick to the bottom of the pan. Add the can of tomatoes with their juices and the Italian seasoning, and let the mixture simmer for about 10 minutes. Taste and add salt and pepper as needed. Keep warm, or set aside and rewarm before serving. (Sauce can be prepared hours ahead of time.)

About 15 minutes before serving, preheat the oven to 325 degrees and heat a grill pan or large skillet over medium-high heat. Brush one side of polenta with olive oil. Place oiled side down in pan and cook for about 3 minutes, or until grill marks or light brown color appear. Brush tops with oil and flip. Cook 3 - 4 minutes longer. Place polenta on a baking sheet and keep warm in oven. Use the same pan to heat your sausage, flipping once a couple of minutes through.

Place three pieces of polenta on each plate. Top with several sausage slices and a couple of spoonfuls of sauce. Top with shredded cheese and serve.

Monday, February 8, 2010

Scrappy Fried Rice


Use it or lose it, I said to myself, as I stared at half a roast beef in the fridge, leftover from Saturday night's dinner. I couldn't let it go to wa$te, but I was really not in the mood for roast beef sandwiches or some other heavy concoction. So I got into the bathtub for a good soak and let my thoughts wander. They wandered to fried rice.

Fried rice can be made any day of the week. All you need is rice, soy sauce, a couple of eggs and whatever scraps of vegetables and/or meat you have lying around. Use what you've got; it will turn out great.


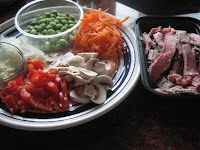
The raw ingredients for tonight's meal

Scrappy Fried Rice
Serves 4

3 - 4 cups cooked white or brown rice
1 - 2 T. vegetable oil
2 cloves garlic, minced
fresh ginger, minced (if you have it; I didn't)
vegetables of choice, sliced small and thin - I used shredded carrots, sliced onion, sliced red bell pepper, sliced mushrooms and edamame
4 - 8 oz. cooked chicken, shrimp, beef, pork or tofu
2 T. soy sauce
2 eggs, lightly beaten
1 T. sesame oil
sesame seeds, sliced scallions or chow mein noodles for garnish

Either use leftover white or brown rice, or cook up some rice anytime during the day to use for this dish.

Heat oil in a large skillet or wok over medium-high heat. Add garlic and ginger and stir for 30 seconds. Add all the other vegetables and stir fry for 3 - 4 minutes, stirring constantly. Add in the cooked rice and stir together with the vegetables. Add the soy sauce (use more if necessary) and stir to incorporate. Add the cooked meat or fish and stir to combine. Press down on the rice mixture with your spatula and let it cook, undisturbed, for a couple of minutes, to get the bottom crisp.

Make a well in the center of the rice in the skillet. Pour in the two beaten eggs and scramble gently. When cooked, incorporate the eggs into the rice mixture. Again, press the mixture down in the pan. Turn off the heat and let sit for a minute or two to crisp the bottom again. Drizzle with sesame oil, garnish and serve.